A useful lot on eBay with these Redoubt figures going at a snip completes the unit. Happy Days!
Thursday, 31 October 2019
28mm Ottoman Heavy Cavalry
Just off the workbench today are a unit of 6 x 28mm Ottoman Heavy Cavalry...
The metal figures are Redoubt Miniatures whilst the plastic horses are from the HaT El Cid range, the HaT figures were really poor so I've had the horses painted and kicking around for months now.
A useful lot on eBay with these Redoubt figures going at a snip completes the unit. Happy Days!
Saturday, 26 October 2019
The Battle of Kadesh, late May 1274 BC
![]() |
| A map of the battle from the time! |
![]() |
| Hittite Heavy Infantry Command |
The rules used were a variation of Rupert's standard ancients rules, the game was played in 15mm using figures from Rupert's collection - which were painted and previously owned by Alan Martin.
The Eygptians started with four commands, each with two chariot units and then typically a couple of Infantry units plus archers, some of the commands had Light Infantry Archers, some commands were accompanied by a baggage train.
One command, with the Ramesses with them were camped just outside Kadesh, Kadesh its-self stood on a hill and was not occupied by either side's military. Two Egyptian commands were marching the length of the table to join Ramesses in Camp whilst the fourth command was off table, not at all far from the camp area.
![]() |
| The rear of Mike W's Egyptian command, with baggage train, just before being hit by Hittite Chariots |
The Hitites were across the rive from the Egyptians, with two strong Chariot commands, poised to hit the Egyptian columns as they marched across the table. A single large Infantry command of about six Heavy Infantry units were also marching into position from the Kadesh end of the table.
![]() |
| Phil's Egyptian command starting to try and march the length of the table |
The action started with a lightening attack by the first Hittite Chariot command, supported by a second command in a rear line, this caught the Egyptian column as it was turning and managed to push back then rout several of the Egyptian units. The only saving grace for the Egyptians was that the Heavy Infantry inflicted high casualties on the attackers and held the line, whilst archers, chariots and Light Infantry fled.
The Egyptians pushed up their second command that was marching onto the field and this had the desired effect of distracting the second Chariot command, who turned to oppose this new threat. In the meantime the Hittites continued to press their advantage in the centre as the routing Egyptians were further punished, Ramesses started to move units from his command out f the camp to oppose the large Hittite infantry column that was snaking its way towards Kadeh.
![]() |
| Ramesses Camp, with units awaiting orders Kadesh can be seen in the background |
Phil commanding the second Egyptian command marching across the table - was able to form up and start hitting out at the opposing chariots with some punishing fire form his archers. meanwhile the Egyptian units that survived the initial onslaught were able to turn and face and start dishing out some punishment of their own.
Suddenly the tables turned again as a number of Hittite Chariot units broke, disrupting their organisation and allowing a number of piecemeal melees to break out, melees that saw the Egyptians gradually gain the upper hand and push away the pesky chariot foes.
![]() |
| Kadesh, the city on the hill. |
As the main Hittite Infantry command crossed the river, it was hit by one of Ramesses Heavy Infantry units, supported by a unit of archers. Melee ensued and after several turns of fighting the Hitties broke, with that the morale of the Hittite commanders also broke and they elected to quit the field.
A good game had by all - great to get out the Biblical figures so beautifully painted by Alan.
Saturday, 21 September 2019
Edinburgh Castle Visit
What a great resource for the military enthusiast, two regimental museums - The Royal Scots and the Royal Scots Dragoon Guards plus the Scottish National War Museum. That on top of the huge array of arms, armour and history on display, covering over a thousand years of history!
Here is just a smattering of what was seen...
| Grenadier Cap from the Royal Scots |
| Eagle of the French 45th Line, captured by Sgt. Ewart at Waterloo |
| Famous medieval cannon - Mons Meg |
| Pikeman's Armour, used in 17th Century |
| More Pikeman's Armour, used in 17th Century |
| Pikeman's Armour, used in 17th Century, more varied styles |
| Last of the Pikeman's Armour, used in 17th Century |
| Array of Scots Arms - Clamores, Lochinvar Axes, Halbards and Dirks |
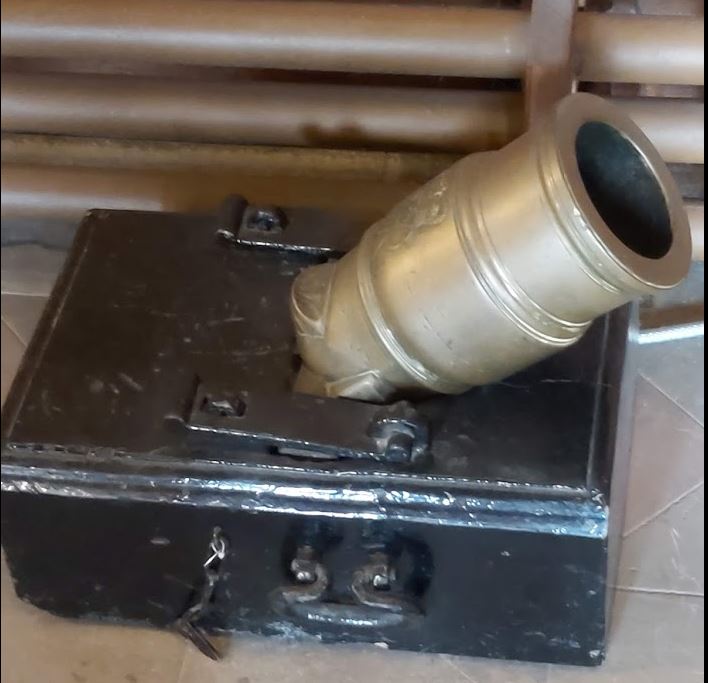
| Cohorn Mortar, used in defence of the castle. |
Tuesday, 6 August 2019
Medieval Islamic Battles
![]() |
| Relief force Heavies (right) harried by Besieging Force Lights (Left) |
The game used Alan Martin's 15mm figures, now owned by Rupert, in a challenging scenario that uses an adaptation of Rupert's popular Ancient Rues.
Steve and Phil commanded a composite Infantry and Cavalry force that is besieging an enemy castle. Mike W and Dave commanded a cavalry only relief force.
The slight change in the rules allowed each commander to determine at the start of the battle how squadrons of cavalry were grouped together - either as individual units or grouped as a unit of two or three squadrons.
By grouping squadrons together units started with greater strength and could therefore take greater punishment but as they got bigger and more difficult to handle they lost their shock capabilities.
Steve and Phil opted to keep all their units as single squadrons whilst Mike and Dave put together a ix of one,two and three squadron units with the Heavy Cavalry and left the Light Cavalry as single Squadron units.
Dave commanded the relief forces Light Cavalry which was on their right flank and pushed this up the elevated ground there to meet and neutralise the Besieging force'sown Light Cavalry which was on their left flank.
The battles between these units lasted most of the game with initial success for the relief force but ultimately a hard won victory for Phil. However, Dave and his Light cavalry had done their job, securing the flank for most of the game.
![]() |
| Islamic Heavy Cavalry |
To Steve's surprise the Islamic Heavies were also bow armed and capable of out-punching the lights who soon started to take serious casualties. The problem being for the Relief force was that they just could not catch the Lights to force a melee and break their will...
It should be noted that the Besieging force also had a lot of troops both Foot and Mounted in camp,before the besieged castle. The could use Action points to more these nits out of the camp to reinforce the units defending against the Relief force.
One Heavy Cavalry unit was brought out of the camp to try and out flak the approaching enemy force on their right flank, however, Steve and Phil concentrated more on using their action points to carry the attack to the relief force with what was already n the table - rather than to build up their own forces.
![]() |
| More of Alan Martin's beautifully panted figures |
Then finally it happened, the relief force's Heavies managed to catch an evading Light Cavalry squadron and destroyed it in combat, the accompanying squadrons, all already badly damaged, had seen enough and fled. This opened the way for the relief force to engage with the first line of the enemy Heavies.
This is where the tactical doctrines of using consolidated units made the difference,the relief force had units of two or three squadrons attacking single squadron enemy unis - who got the shock impact bonuses on turn one but fell to the massed strength of their opponents in the second round, loosing melee and breaking as their strength had been smashed in those two combat rounds...
The relief force's Heavies surged forwards towards the Besieging forces second line of Heavies only for Steve and Phil to call it a day - their spirits broken.
Week Two will happen, its now up to Rupert as to what form this will take, a continuation of week one or a reset and rematch with commanders learning the lessons of their mistakes!
Labels:
15mm,
Friday Night Games,
Medieval
Sunday, 28 July 2019
Battle of Hythe, Sealion Campaign
![]() |
| Downtown Hythe, with the disputed bridge across the local canal |
This game was staged as part of John's ongoing (sometimes) Sealion campaign, using 20mm figures and the popular 'One Hour Skirmish' Rules in a game that ran for two weeks from Friday 19th July - Friday 26th July.
The scenario saw a group of German Paratroopers dispatched to Hythe to hold a key bridge and prevent hurried British relief forces pass through the town and oppose German landings on the nearby beaches.
Week One saw the Germans encounter and defeat the local Home Guard, in a somewhat speedy manner, allowing then to capture the bridge. However the Home Guard had put up a surprisingly stiff resistance before breaking - causing some damage to one of the German Para units.
Week Two saw the arrival of the British Regulars who made up the relief column heading towards the beaches and these arrived in a constant stream through out the second half of the game, putting increasing pressure on the German Para's hold on the bridge.
After spending time building up their forces the British rushed the bridge and were lucky to inflict a number of casualties on the already damaged German unit which retired from the fray with a view to redeploy elsewhere.
![]() |
| Railway Station, with British Occupiers in place |
Only question remaining being the decision form the umpire on the strategic impact of this game, were the British regulars held up long enough to prevent their intervention on the beaches or have the Germans simply moved off elsewhere to cause more behind the lines mischief?
Only time and John can tell...
Labels:
20mm,
Friday Night Games,
WW2
French Royal Dragons
Quick posting of the latest Louis XIV unit to be completed - The Royal Dragoons circa 1680.
The French took up the idea of Dragoons early on and created a number of Dragoon units each with their own unique uniform colours, The Royal Dragoons being in Blue coats with Red facings.
I used a batch of Front Rank figures that I obtained from eBay to build two squadrons of this Dragoon unit.
Additionally I did a dismounted version of the unit on half bases, allowing the unit to deploy as a skirmish line or as a small infantry unit.
Finally I added a Horse holder stand to indicate where the unit's mounts can be found, should they want to rejoin their horses after deployment.
![]() |
| Mounted Unit |
I used a batch of Front Rank figures that I obtained from eBay to build two squadrons of this Dragoon unit.
![]() |
| Horse Holder |
Finally I added a Horse holder stand to indicate where the unit's mounts can be found, should they want to rejoin their horses after deployment.
![]() |
| Dismounted Unit |
Subscribe to:
Posts (Atom)