Showing posts with label Siege of Vienna 1683. Show all posts

Sunday, 3 July 2022

Friday Night Games - The Siege of Vienna, 1683

Friday, 1st July saw the much overdue playing of Mike W's 28mm Siege of Vienna game. It was staged at Mike N's venue and used Warlord Games Pike & Shotte rules, with some variants to keep the mechanisms simple and flowing.

On the allied Austrian / German/ Polish side (Hereafter referred to as the Western Allies), we had Mark, playing the Austrians and thus assuming that he had overall command and taking up a position on the right of the line.

This notion was not fully endorsed by Mat, who commanded the Polish Divisions in the centre. Ably assisting Mat was Phil, commander of the Polish 2nd Division.

On the left of the line was Dave  playing a polyglot of German allies  loosely known as the German (or Imperial) division.

Massed Austrian, Polish & German Cavalry Divsions

Phil threw he cat amongst the pigeons by playing his black mark ⚫ on turn one against Mat's division. The resulting blunder sees Mat' two units of Cossacks leaving the field, they did not return for several turns much to everyone's amusement.


Mark's Austrian Cuirassiers & Mat's Polish Panceri race ahead on the right

On the Ottoman side, we had Steve playing ad the Grand Vizier  commanding the Janissaries & Sipahis of the Porte as well as the artillery.

He was backed up by Mike N, who as First Vizier had command of the Heavy & Feudal Sipahis.

Turkish and vassal light cavalry was under the command of Nigel  whilst Infantry units were split between them in the absence of John  who will be re-joining his command in week two.

Ottoman Tufecki Infantry supported by Ottoman Deli Light Cavalry & Hungarian Hussars

The Western Allies plan was straight forward, a rapid advance straight forward! This was enacted as rapidly as possible but somewhat held-up as commanders struggled to get there orders out to their units in a timely manner. 

Orders being subject to a Command test based on their commander's capability ratings.

Over a course of a few turns, Mat's Poles and Mark's Austrians were behind the pace. On the left Dave's Germans  led by he Bavarian Cuirassiers  made much better progress.

Towards the rear of eth Ottoman lines there is much activity,
Janissaries in the background and Sipahi Cavalry manoeuvring to their front 

On the Ottoman side, commanders scurried from their tents to join their units to put together a defensive plan.

Nigel's Light Cavalry were soon in the thick of it  managing to give a good account of themselves alongside various Azab and Tufecku Infantry units.

Polish Panceri Heavy Cavalry with a unit of staggered Cossacks behind.

End of week one and there's all to play for, Ottoman units are holding g up well but two Infantry and two cavalry units have been sent back to the box.

The Western Allies have four of five units with casualties and their opponents have two or three on the same situation.

As ever I'll leave much of rest of the report to the pictures, week #2 is due to be played July 8th.

Polish Winged Hussars make contact with Ottoman Mamelukes,
the Mamelukes held out for one turn but were destroyed in the following melee round!


General view of eth table from the Western Allies right flank,
looking down the table to eth Ottoman Right 


The game in full play, Week #1

Week Two saw a slight change in the Ottoman line-up, Nigel was unable to attend but his place was ably taken by John, who took command or the Ottoman Light Cavalry.

The Western Alliance continued to roll forwards, eliminating Ottoman units and pushing them quite quickly into their own half of the board. On the left flank the Bavarians continued to do well, but at the loss of one unit of Cuirassiers. Luckily within the German Division the Saxon Cuirassiers stepped up to replace them.

On the right flank of eth Western Allies, Austrian Horse advance behind their Cuirassier comrades

Austrian Cuirassiers wheel to engage Hungarian Hussars to their left

Ottoman Guns finally come into play and start to bombard advancing Western forces

The grand sweep of the Western forces as they close with the Ottoman infantry's defensive lines in the centre of the board.
The Polish Winged Hussar unit at the bottom of the picture has just been staggered by artillery fire

The rest of the line from above!

Ottoman Sipahi of the Porte advance out of their camp to engage
with the approaching Austrian Juggernaut

Not so good photo of eth Ottoman Infantry's positions


Time was called at the end of week two, The Western assault on the Ottoman lines was just starting, albeit that the infantry positions were being avoided as much as possible. On the Western left it was deemed that he German division would likely break through the Ottoman cavalry and levy lines, enabling them to flank the Janissary positions in the centre, on the right the Austrians had a much harder fight to overcome the four units of the Sipahi of eth Porte and a Janissary of eth Porte unit.

In the centre the Poles would have had to crash into eth Janissary lined up behind Chevaux de Fris, another tough ask but with cunning and bravery it would have been possible! But we'll never know for sure.

Thanks to all that played.

Monday, 20 June 2022

Siege of Vienna - Part Five, Ottoman Infantry

Did I forget to say that the Ottomans have Infantry units available to them? Obvious really if you think about it, cavalry can't man the trenches!

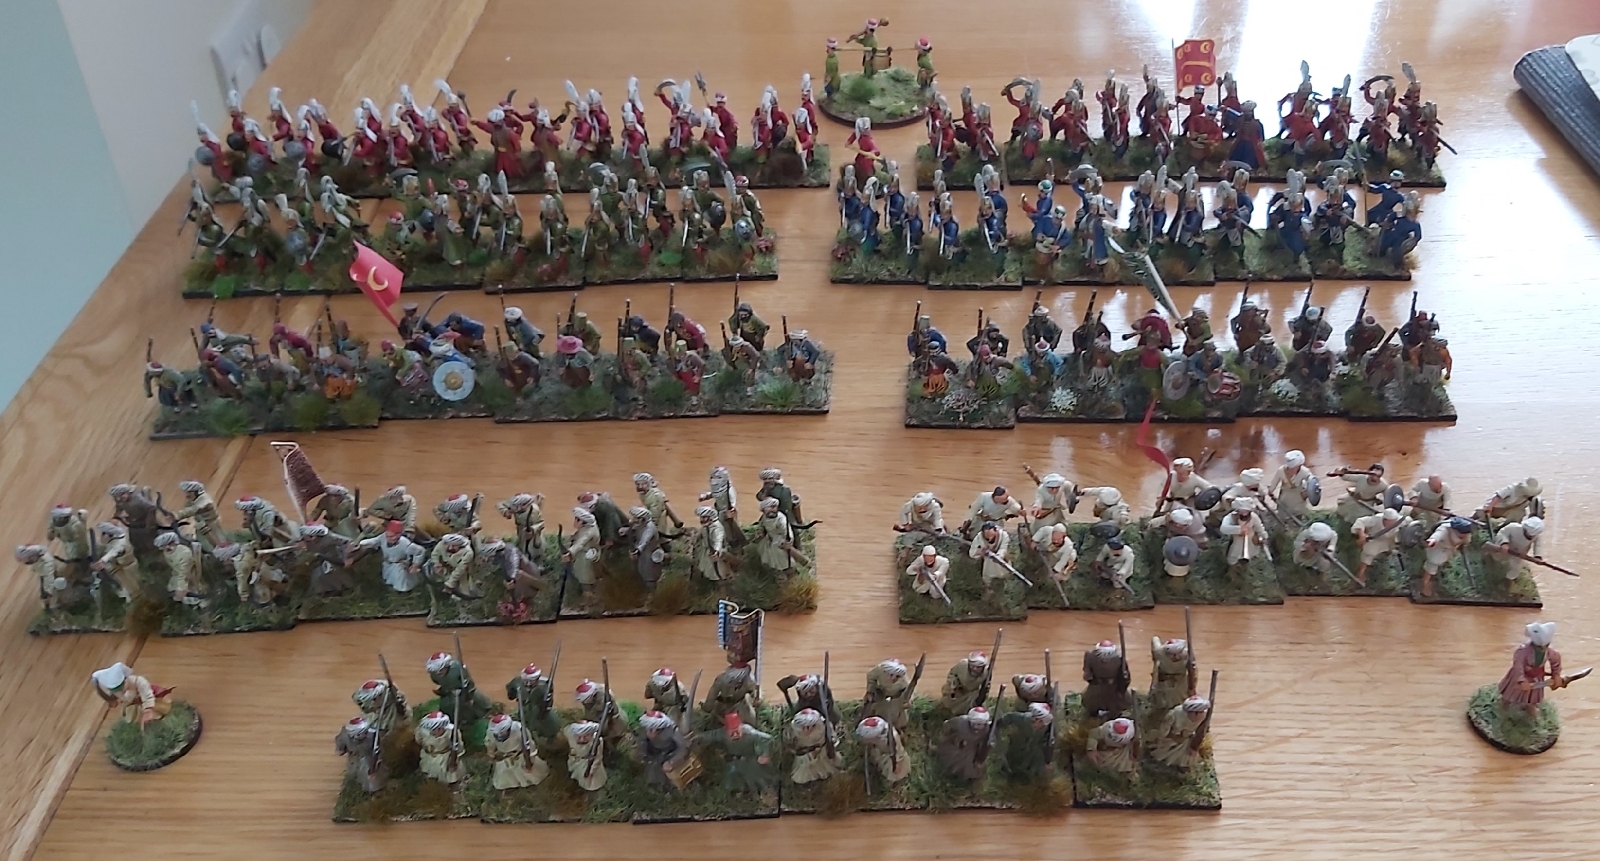
Nine infantry units that make up the Ottoman infantry forces present at Vienna.


Another view of the Infantry units

In general I am splitting the infantry available into three type, working up eth 'quality' ladder as we go!

Azabs
Mostly unmarried men, conscripted into units to support the needs of the army. Also these guys were often provided with older /poorer weapon choices.

Musket armed Azab unit


AnotherMusket armed Azab unit


Bow armed Azab unit

Balkan Tufekci
Men from the occupied regions in the Balkans, usually pretty well motivated and reasonably armed.

Balkan Levy unit


Another Balkan Levy unit

Janissaries 
The cream of the Ottoman Infantry, often made up of captured foes, pressed into service as young children and trained in the ways of war for years. These are highly motivated, well armed and experienced troops.

The Green Regiment, 

The Blue Regiment, 

The Red Regiment, 

The Janissary Kettle team - part of head quarters 

Two Janissary Officers

Janissaries of the Porte - The Best of the Best! 

Monday, 25 April 2022

28mm German Infantry in Polish Service. Swabian Regiment

I started this regiment as part of the AHPC XII challenge but ran out f time to finish these little guys, in the painting sump post challenge it has taken until now to get the regiment finished.

The completed Swabian Regiment 

I was anting to add a 'German' regiment to the Polish forces, in reading about Polish Army organisation in the Late 17th Century there are regular references to 'German' regiments in Polish service, recruited from the western most borders of the Polish state - where the influences on dress and tactics were much more akin to Western Europe as opposed to Eastern European standards adopted by the bulk of the Polish forces.

Close-up of one of the Musketeer blocks in the regiment

So here they are - I found a plate showing a 'German' regiment in a simple light blue uniform, which I have recreated here. I have adorned the men with red waist sashes, trimmed white - to reflect Polish colours.

The Swabian Command stand, surrounded with Pikemen,
City of Memmingen standard on the left, Polish National flag on the right 

The regiment is set-up with my usual organisation, i.e. four stands of musketeers, a central block of eight pike men plus fore command figures. The command figures carry two speculative flags, a Polish national banner plus the city banner associated with Memmingen, found on the Swabian / Bavarian border.

The second musketeer block

Thursday, 21 April 2022

Siege of Vienna - Part Four: Ottoman Artillery

Everyone know that during a siege, we are bound to see a lot of artillery, this will also be the case in this Siege of Vienna game.

Ottoman Field Gun manned by a Balkan crew

The Ottoman Artillery will initially be focused on executing the ongoing bombardment of the city but then scrambling to redirect their fire on the pending Imperial attack. I have taken the view that the heavy siege weapons would not be able to re-deploy against the Imperial forces appearing at their rear - these will be off-table.

Instead it is Field guns and Light guns that will be able to be redeployed to cover the rear,  as the game progresses. As such there are five Field Gun batteries and a Light battery available to the Ottoman forces in the game

The Light Gun Battery

Available from turn one of eth game, this piece is hand portable and can fire immediately at the oncoming Imperial hordes.

Ottoman two man, Light Gun crew.
The gun model will likely be swapped out for the game for a more realistic looking piece of equipment

The Field Gun Batteries

These will become available, basis a die roll at the start of each turn, on a score of '1' on turn one, the guns can redeploy that turn and are available to fire the following turn. On turn two the battery will redeploy on a '1' or '2', and so on until turn six when all guns will be able to redeploy if not yet done so.

Two more Field Gun batteries, manned by Turkish crews

And the other two Field Gun batteries, again manned by Turkish crews.

The Gun Master

The Ottomans will also have the services of a Master Gunner, who will be able to share his knowledge and experience of the art of gunnery with the crews. This will help the speed up initial redeployments and later accuracy of their firing

The Ottoman Master Gunner

Monday, 18 April 2022

Siege of Vienna - Part Three: The Ottoman Cavalry

 Having walked through the forces available to the Polish, Austrian & German players it would be best to highlight their opposition next. In case anyone is unaware the 1683, Siege of Vienna was fought between the Holy Roman Empire, dominated by the Austrians and their enemies the Ottoman Empire, who had been pushing in to Eastern Europe for decades.

The Ottoman Cavalry Force

As such the combined masses of Christian Cavalry were to be pitted against the best of the Ottoman Army. Ottoman Cavalry was typically of poorer quality that their opponents but they had much more of it in most set piece battles.

The Ottoman Cavalry Leader

At Vienna the Ottoman horse will be represented as follows:

The Sipahi of the Port

In general terms the Sipahi of the Port can be considered Guards Cavalry, armed with lance, bow, hand weapons and pistols, protected by chain mail, these heavy horse were arguably the best cavalry in the Ottoman Empire.

The Ottoman's best mounted troops - Sipahis of the Port

There are four units of the Sipahi of the Port that the attacking players will encounter, in total some 24 figures plus leaders

The Sipahi

The Sipahi are the bulk of the Ottoman cavalry, quality wise not as good as the Guards / Port troops by typically armed and armoured in exactly the same manner.

A large unit of 'Heavy' Sipahi

The attacking player here will encounter four units of Medium' Sipahi, representing the run of the mill units in the army plus a larger unit of 'Heavy' Sipahi, representing the best of the massed cavalry. In total some 32 models plus leader figures.

The masses of the 'Medium' Sipahi, with the Sipahi Leader

The Light Cavalry

Next we find opposing the Christian horsemen a mix of Ottoman Light Cavalry, from different sources.

The Massed Ottoman Light Cavalry with their leader

The bulk of the Ottoman Light Cavalry is made up of unarmoured Turkish horsemen, who are armed with spear, bow and hand weapons. Some will also carry pistols and / or muskets. There are four units, totalling 24 figures plus a leader in the Ottoman Army.

Alongside the Light Horse fought a number of allied contingents, here represented by a small Hungarian Hussar unit - unarmoured with swords and pistols.

A small unit of Hungarian Hussars

A unit of exotic looking unarmoured Deli Cavalry, with their winged head dresses, armed with spear, bow and hand weapons.

An independent unit of Deli Light Cavalry

And finally a unit of Mamelukes from North Africa, armed with hand weapons and pistols etc.

An independent unit of Mameluke Light Cavalry

In total some 42 Light Cavalry...

Thursday, 14 April 2022

Siege of Vienna - Part Two: The Imperial Cavalry

The forthcoming Siege of Vienna Scenario will pit the combined Cavalry resources of the Holy Roman Empire and the Polish - Lithuanian Commonwealth against the Ottomans, in a do or die battle...

The Imperial Cavalry Divisions at Vienna, the Austrian Division
is on the right and the Imperial client State Division to the left

By way of background the Siege of Vienna was entering its final stages when John III Sobieski, allied with Holy Roman Emperor Leopold I to deal crushing defeats to the Ottoman Empire. The 1683 battle marked the final turning point in the 250-year struggle between the forces of Christian Europe and the Islamic Ottomans. 

For its centuries-long opposition to Muslim advances, the Commonwealth would gain the name of Antemurale Christianitatis (bulwark of Christianity). Final victory for the allies was to take a further 16 years, a period known as the Great Turkish War, which would see the Turks permanently driven south of the Danube River, never again to threaten central Europe.

In Part One of these posts, I reviewed the Polish Divisions available to the players, here I will look at the Imperial Forces - again two divisions - one solely consisting of Austrians and the other made-up of a number of units from German client nations.

The Austrians

The Austrian Division consists of three Regiments of Cuirassiers and a Regiment of unarmoured Horse. The unarmoured Horse regiment consists of two squadrons which may act individually or in unison with each other.

Austrian Horse, with the Austrian Commander of Horse

Similarly there are two Austrian Cuirassiers units both with two squadrons, which may act as per the Horse squadrons above. There is also a Third Austrian Cuirassier unit of just one squadron that may be used independently or may be added to one of the two Cuirassier units noted above and allow that unit to operate in unison as a three squadron regiment if so desired.

First Austrian Cuirassier unit with the Austrian Cuirassier Leader attached.

Second Austrian Cuirassier unit, all depicted as carrying Pistols.

Austrian Cuirassiers count as Armoured Heavy Cavalry and are thus not so quick on the table-top, they are armed with Swords and Pistols. When deployed in multi Squadron regiments they may use their weight on numbers to ad to their impact when making contact with the enemy.

Unarmoured Austrian Horse move somewhat quicker than their armoured brethren and they may also make use of Impact bonuses when making contact with the enemy if they are deployed with their squadrons acting in unison

Third Austrian Cuirassier unit, this unit may be deployed independently or it may be attached permanently to one of the other Cuirassier units to make that unit a three Squadron Regiment

So the Austrians have a total of seven Squadrons of 6 figures each - giving a total of 42 figures, plus a Commander of Horse and a Commander of Cuirassiers.

The Germans

This German Cavalry division represents all the units supplied to fight as part of the Imperial Army, alongside the Austrians and as such it is made up of a number of different nationalities. Again these are all Cuirassiers, with one unit of regular Horse.

All the above notes about squadrons acting in unison apply here as well.

Saxon Cuirassiers, with their Leader, a two squadron Regiment

Bavarian Cuirassiers and their National Leader

Brandenburg Horse, two squadrons strong. 

Wuttenburg Cuirassiers, a single squadron regiment,
they cannot combine with any other regiment

Numbers wise, this division has another seven Squadrons of 6 figures each - giving 42 figures, plus four National Leaders.

With the Imperial Commander that gives a total of 91 figures.

More about their Organisation

Oh where to begin about explaining the organisation of the Imperial Army! 

Lets just be kind and say it was hugely bureaucratic and inefficient! The Holy Roman Empire was dominated by the Austrians, other states were not bound to the decisions of the Emperor but generally went along with his desires but there were always exceptions and caveats to the rule. 

To represent this commands to the Imperial Commander of Horse must send orders to the National Leaders, before passing these on to the units themselves. Austrian Leaders command multiple units, the Imperial Client State leaders just one

Commander of the Imperial Horse

Coming Soon... 

Part Three: The Ottoman Cavalry