Monday, 15 January 2024

AHPC XIV - From Mike W - More Savage Orcs and Tau plus 28mm Alamo Cavalry.

  Into the second week of January and my painting production line is moving into full swing, at last! This week I present more Warhammer Fantasy Savage Orcs alongside another group of Warhammer 40K Tau models. In addition I have been working on a long overdue set of historical Alamo 28mm mounted troops.

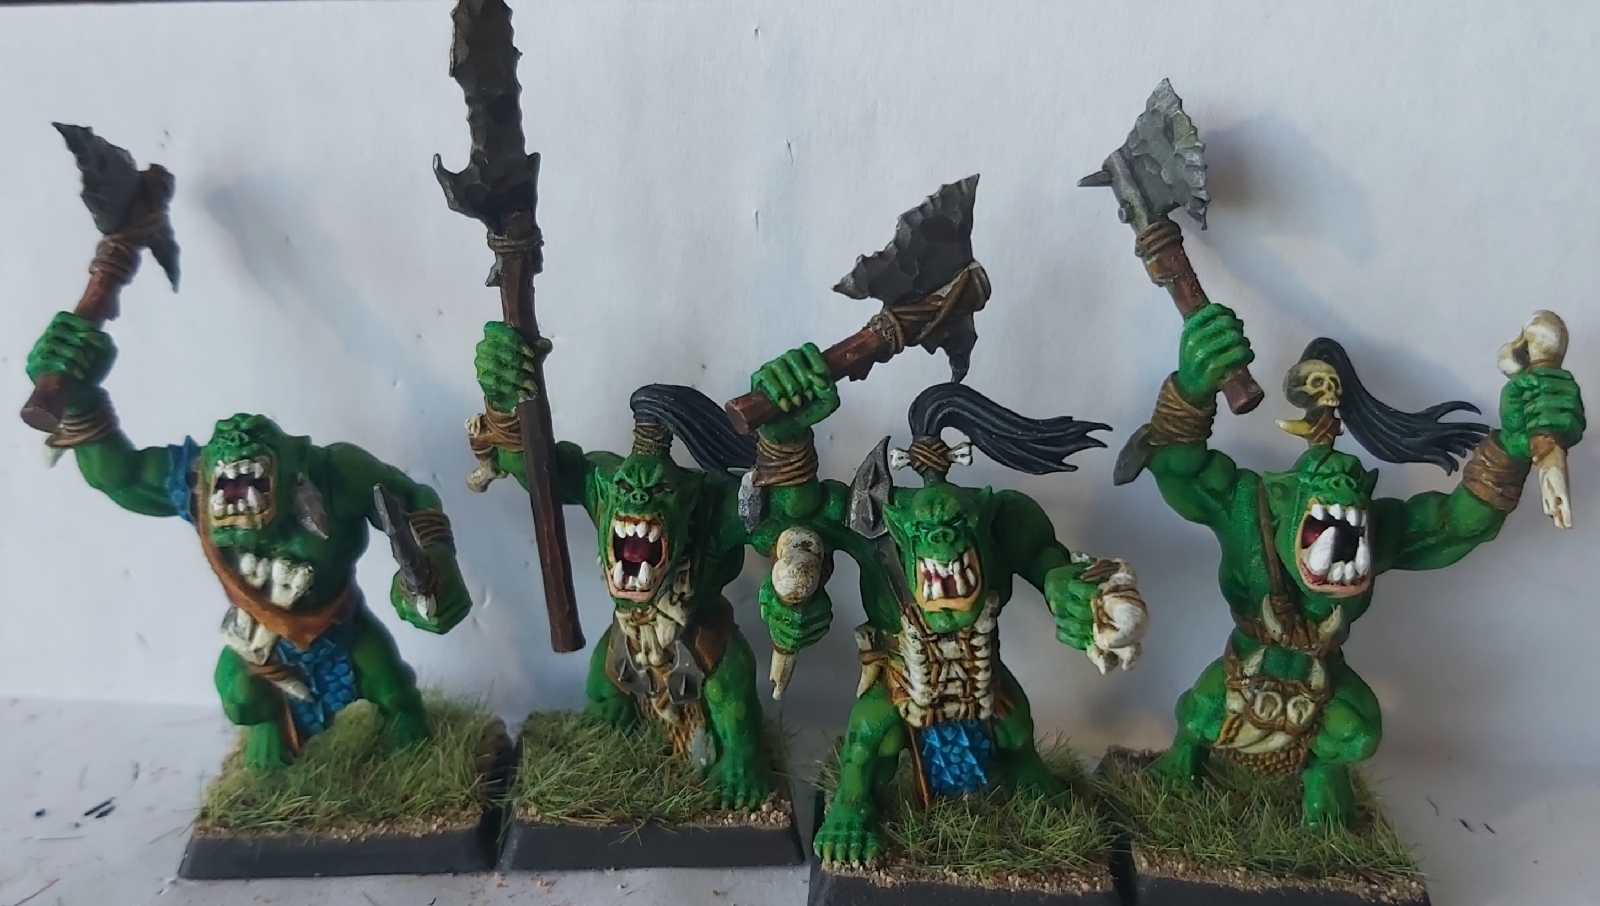
Let's begin with where I left off last post and finish the Savage Orc unit that I had started last week. Today I have an additional 14 figures, all completed in the same manner as last week's posted figures. Together they make up a 20 strong unit.

The group of 14 Savage Orcs, completed this week.

The colour scheme remains the same - vivid green skin - all that healthy outdoor living by these Savage Orcs - they are armed with a variety if crude weapons, blades made form bone or roughly crafted iron & steel.

A view of the second rank of figures.

As previously noted, I source most of my figures from eBay, these guys being no different. They came partially built and totally unpainted, which was nice. Just a matter of minor surgery to add weapons to hands, or hands to wrists or heads to necks etc!

And the final third rank,
The bone armor makes a good contrast to the green skin of the Orcs.

Armour is bone based with small shards of iron attached to give additional protection by those Orcs with enough mental agility to think of such refinements. Overall I'm pretty pleased with the outcome.
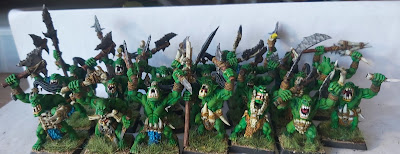
All twenty Savage Orcs re-united. I need to find a suitable standard bearer
and musician for these guys and potentially also a unit boss.

Next, I'll cover the 28mm mounted figures that I have got completed this week. These are for my Alamo collection, these figures are from Boothill Miniatures, they have been sitting in my drawers for a couple years and it was high time to get them painted!
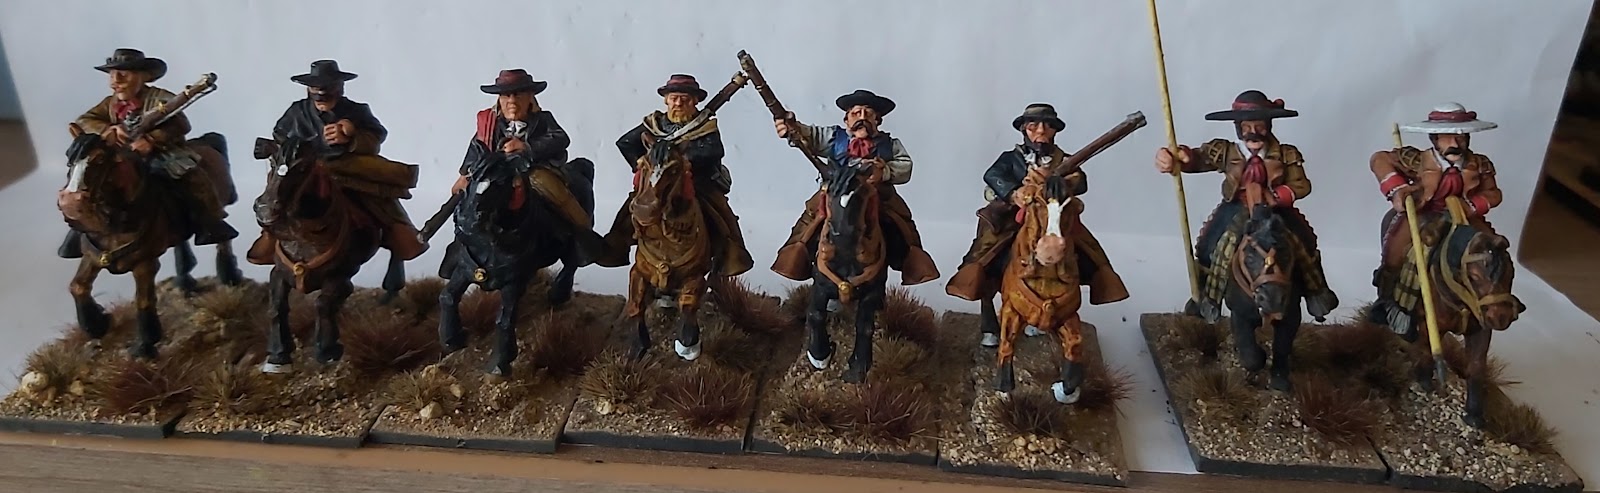
Eight Alamo related 28mm mounted figures, long waiting to get finished!

There are six Mounted Alamo Volunteers, these are Anglo-Mexicans who fought on the side of the Texas Republic. Figures were undercoated white and then I used speed paints to block in the horse flesh and a variety of browns, greys and blues etc on the little guy's chaps, clothes and weapons etc.

First three Alamo Volunteers, a lot of leather on show for these figures,
I used a red accessories theme to try and tie these guys together in to a unit.

The other three guys, you'll see all the horses have red tassles on their bridles,
I assume this is to keep the flies away. The men have red bandanas or ties around their necks as well.

I believe the two Mexican Irregular Lancers are also Boothill figures but I'm not 100% certain, these were painted in a similar manner to the above.

The two Mexican Irregular Lancers, again with red details (well I had the pot of paint out!)

I used a Flesh wash to add depth to the skin areas and a dark ink wash on the rest of the rest of the figures to add shading and keep them in line with the rest of the collection.

Next group was my continuing saga with the Tau, I have completed another three Stealth Warriors in much the same style and method as the first three that I submitted. 

Three more Stealth Warriors, I really like the size and feel of these Stealth Suits.
They seem easier than the regular troopers to paint.

Next there are a group of nine Tau troopers including a Gue'Vesa (Human) Squad Leader.

This week's batch of Tau

Additionally I found a fantastic Sci-Fi figure on eBay that I fell in love with as soon as I saw him, thinking that he'd make a great Tau Gue'Vesa - possibly even a alternative for a Tau Ethereal...

My 'Proxy' Ethereal.
I just liked the pose and the feel of this figure!
No idea who manufactured it...
.

Finally I painted a Tau Rocket Launcher, again in the same colour scheme as the rest of the army that I'm putting together.

Is it a figure or a terrain piece? I'll leave that to or minion!

So in completing this week's Tau figures, I realised my schoolboy error on the basing! I've not been using my usual brown gloop on these bases, instead I'm using an Orange 'Hobby' paint, all well and good for the desired look but I've forgotten to add in PVA glue - so there are issues with the sand and tufts remaining stuck to the base. 

The solution I have used here is to use a generous coating of mat varnish to soak into the basing materials, hopefully this will fix the issue. I have retro fitted this solution to my other completed Tau and all new figures will get the PVA added to the base when the orange paint is applied. The perils of experimenting with new solution!

Four new Tau Troopers, with a Gue'Vesa Sqad Leader on the left.

The rest of the squad

Points wise I think my submission this week is pretty straight forward, however, I'll have to call on my already 'long suffering' minion for a ruling on the points for the Tau Rocket Launcher. I have claimed 5 Points - as per all other 28mm figures - but this may be considered to be a piece of terrain. I'll go with whatever is decided!

Additionally I'm claiming the Historical Bonus for the Alamo Mounted Volunteers and the Overdue Bonus for the Mexican Irregular Lancers, I see others have had this allowed as we are limited to one posting per week so hopefully everyone will think that is fair.

Completed two new locations in the Challenge Library

What's coming next - hopefully in the next week or so there will be some Goblin Frog Riders, more Tau and some Warlords Epic ECW Scots Covenantors, as well as General Santa Anna, a mounted Polish Kettle drummer and who knows what else takes my fancy...

Highlands Miniatures Swamp Gobllin Frog Riders.

Highlands Miniatures Frog for the above Riders.

Undercoarted Warlord Epic ECW Infantry on the frame

Saturday, 13 January 2024

Friday Night Games - Battle of Stamford Bridge (Week Two)

Week Two of the battle saw the usual change in commander assignments, according to player availabililty. The Anglo Danes were again lead by John, playing Harold Godwinson, alongside Phil who continued playing Edwin of Mercia and they were joined by Steve who took on Mocar of Northumland's command.

On the Viking side the leadership team remained unchanged, with Rupert playing King Haraald, Dave playing Tostig Godwinson and Mat plating Eystein Orri.

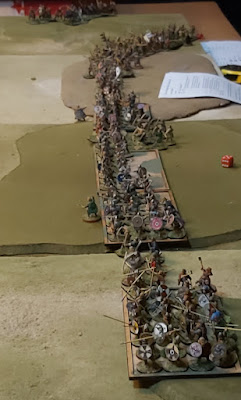
The procedings picked up from the end of Week One, with the Ango-Danes engaing the Vikings along the length of their line. I'll leave the photos to explain this set-up.

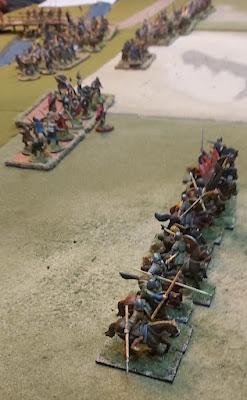
Early on Week Two, on the extreme Viking left flank, a unit of Huntingdon Mounted Selct Fryd battles with Eystein Orri's Bondi and Archers, the horse is forced to retire and they stay out of the fight there onwards

Opening moves on week Two see Steve replace the mounted Slect Fryd with infantry units in the attack on the Viking left flank. What had seemed to be a staright forward task was complicated by the continued arrival of units belonging to Eystein Orri on that flank.

Luckily for the Anglo-Danes the cramped positions on that flank, left little room for Orri to deploy his men to greater advantage and as time progressed the rolling collapse of the Viking left flank gave all Viking commanders increasing cause for concern.

Bottom left we can see Harald Haraada and his bodyguard in the front line fighting the advancng Anglo-Danish Wessex men. To Harald's right are a unit of Hirdsmen, both are fighting Wessex Select Fryd.

A small unit of Berserkers have caught an Anglo-Danish General Fryd unit in their flank, these unfortuneate Frydsmen are also facing Viking Hirdsmen to their front.

On the Viking right units from Tostig Godwinson's alliance of English rebels and Viking allies were in trouble, hard pressed by Harold Godwinson's Wessexmen. after an hour or so of fighting Tostig fell, quite possibly to the axe of his brother Leofwine - but confusion in the battle and passage of time have blurred the memory. For certain each brother was in the frontline fighting each other.

To the right of Harald Haraada's position we we can see Tostig Godwinson with  his bodygaurd and Hearthgaurd fighting in the line, with allied Frankish spearmen to their right. They are facing Wessex Select Fryd and Housecarl units

With Tostig' death and the gradual crumbling of the Viking flank, the overall Viking postion became more and more difficult, yet Harald and his men held on. Even the remnants of Tostig's Hearth Guard surrenedered when facing the overwelming odds but Harald fought on.

Later Eysein Orri, slipped away from the battle, (well Mat had reached his curfew time!) with a view to readying the fleet and allow Harald to get away.

Disaster strikes to the extreme right of the Viking line when one of the flanking mounted Select Fryd from Huntingdon are able to force the defendng Enlish Rebels, under Tostig Godwinson to retire. The horsemen follow-up and catch the foot and inflict even more casualties, turning the retirement into a near rout. Centre can be seen the mounted figure of Earl Waltheof of Huntingdon.

A view along the battle line, from the Viking left to their centre right, in the center we can see Earls Wlfred and Earl Godfred of Auchenforth, both sb-commanders under Earl Morcar, leading the fight against Eystein Orri's Viking re-enforcements

In the end Harald and his battered forces spotted a lull in the fighting and used this to order his men to withdraw in an ordered manner, heading back to Ricall to board their ships and return to Norway and lick their wonds.

Harold Godwinson, seeing this did not persue, knowing that he had other battles to fight - possibly in the very near future!
Back on the Viking right flank,  after Tostig's death and the loss of the English Rebels, the unit of Scots spearmen is cut-off and surrounded. The Scots, seeing that they are totally outnumbered and face slaughter - lay down their arms and surrender.

The continuing collapse of the Viking left flank is caught here in this photo.

Next outing we'll see the entry of William of Normandy and his allied forces at Hastings, looking to enforce his claim to the English throne. Will the Godwinsons prevail or will the battle go the way of history. Stay tuned  to find out!

Sunday, 7 January 2024

AHPC XIV - From MikeW: Warhammer 40k Tau, Fantasy Savage Orcs and various 28mm Figures

 I've switched my focus back to the Tau as I have now completed 5 x trooopers, 1 x drone, 3 x Stealth Fighters and 2 x Crisis Battlesuits. All with the same white and Orange theme that I piloted in my first post of the challenge.

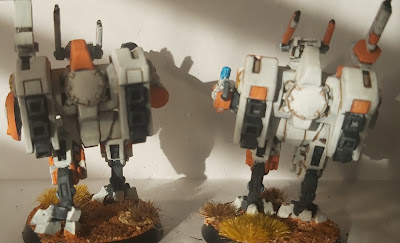
Two Tau Fighters in Crisis Suits,
large Sci-Fi mechs, with varied weapons load-outs
 

Rear view of the same

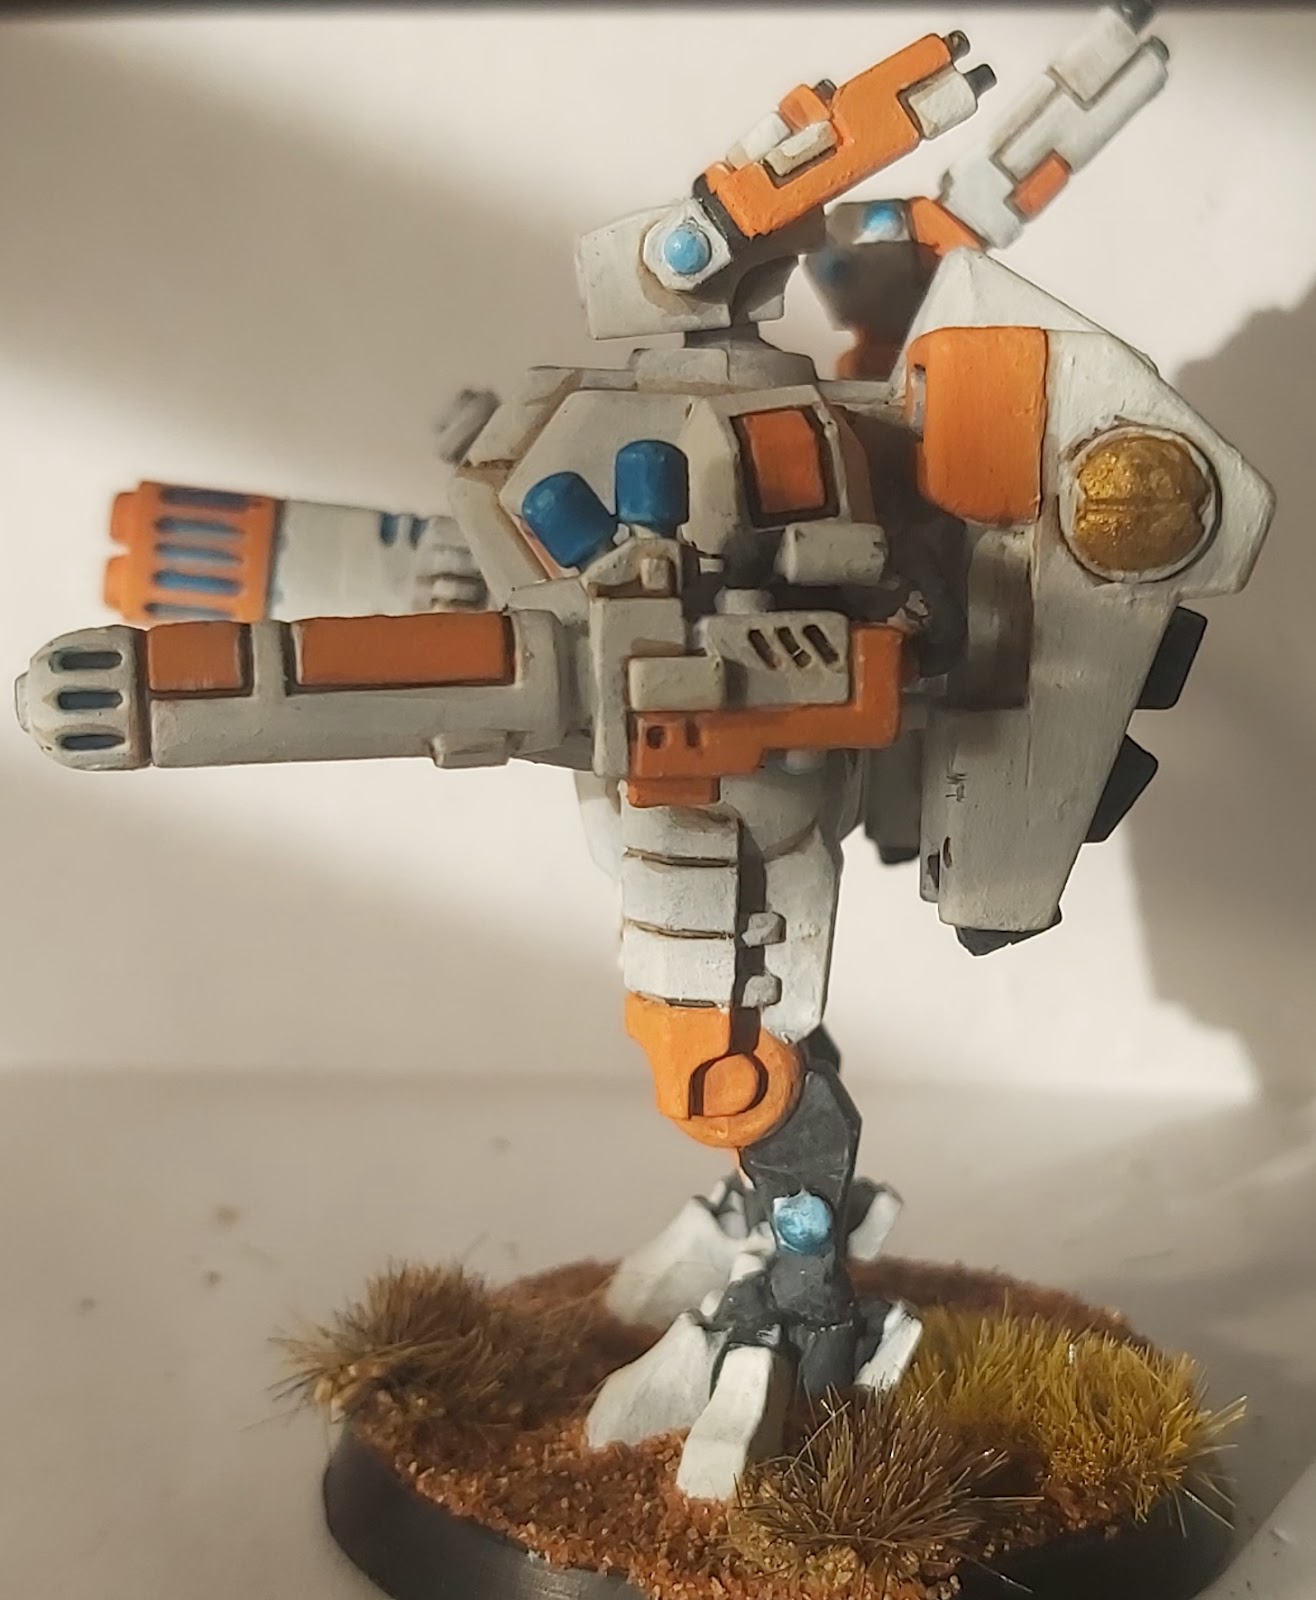
Close-up of one of the Tau Mechs.

...and the other one.

The three Stealth Suit Fighters have benefited from being slightly larger models that the standard Tau Troopers, this made the pinlining of the armour panels much easier to do and I'm pleased with the results. Again these guys have the same white armour, painted in the same manner as previously described, with random orange panels, the only item that remains constant  is that all models will have a left knee pad that is orange.

Three Tau warriors in Stealth Suits,
these are similar is size to old school Space Marine Terminators

These guys each carry a heavy weapon in their left hand and have various load-outs on their back packs and antenna as required.

Reverse view of the Tau Stealth Warriors

The Crisis Suit Fighters are the smallest of the Tau 'Big Mechs' and these two were sourced from eBay and came pre-made with the load-outs that you can see. Again these figures were undercoated in a grey and then dry-brushed light grey and then white before applying several white glazes to bring out the highlights.

Business end of a Large Plasma Gun

Again the panel lining is easier due to their size but also due to their size tere are alot more panels to line! The black is done with GW Black Templar contrast paint, whlist the panel lines are GW Aggrax Earthshade.

Reverse side of the other Mech, with a combat Force Field shield

The weapons on each figure vary, I believe each can have upto 4 weapons attached to their 'hardpoints' but each has only three. (I may add more later as I build p a supply of spares).

Tau Droid to spport the additional Tau Troopers

Regarding Points, I have counted the Stealth Suit Warriors as regular 28mm figures, my logic being these are similar to Space Marine Terminators who get scored that way and also counted the drone as a regular figure as well. For the Crisis Suit figures I have counted these as 28mm vehicles, as they are considerably bigger than regular figures - I have seen similar in posts to older challengers but happy to be corrected if that oversteps the mark.

Tau Trooper section with a Gue'Vesa on the left 

Size comparison of Crisis Suit, Stealth Suit and regular Tau Trooper

The other items that I have been working on are a first batch of Savage Orcs, the first six figures of a twenty strong unit, which I'll hopeflly finish in the next week or so.

First six Savage Orcs, of a twety strong nit that I'm working on!

These guys were again sourced on eBay and they were a ready made totally unpainted unit with a few figures needing a bit of TLC to either complete their construction or put back together where they had broken. 

Close-up od three of the Savage Orcs

These are essentially wild Orcs, with very few clothes on them except for the skins of various beasts that they have slain. These figures are heavy on bone weapons and body ornamentation and again disappointinly sparce on skulls, only two in this first batch!

The painting method was essentially the same as in my last post bit with the lack of clothing to distract the eye, the skin has appeared to retain a very vivid green hue. I have offset the skin with alot of attention to the bone and this was achieved with an ivory paint job, washed with GW Skeleton Horde and the highlighted with more Ivory and then White.

The remaining three, just 2 skulls between them all!

I opted for the Lizard skin clothing to be blue, so this is an Army Painter Blue Speed paint, then dry brushed with a sky blue before being washed with a dark blue ink to pull the colours together.

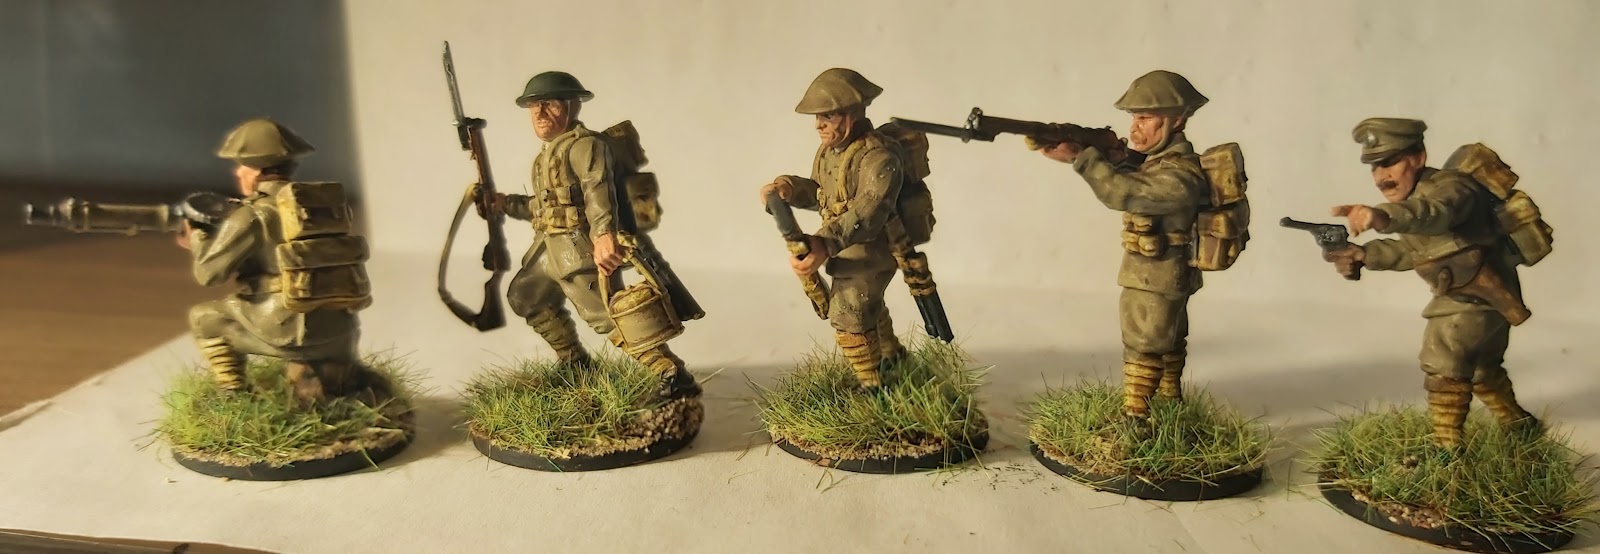
Finally I have also completed a few 28mm figures for some of my historical interests. Of these I have 5 x Interwar British Infantry, these are Wargames Atlantic plastics, built to represent a faction in a proposed Very British Civil War (VBCW) collection that I'll put together. Some older readers may remember I have done VBCW figures in 20mm previously - but I have decided to go big and swap to 28mm for future figures.

Five Man Infantry Squad, Lewis Gunner on left,
next to his No.2, then two riflemen and an officer.

There is an officer, 3 riflemen and a Lewis Gunner, these guys were undercoated in white, painted with a watered down khaki and webbing and packs in a light brown. I'll claim a Squirrel point for these guys! Hopefully I'll find time to do some more as the challenge progresses.

Another view of the Interwar Infantrymen

Last figure this week is a Polish Late17th Century Foot Officer, armed with a two handed sword, he is destined to command a Polish infantry regiment in my Siege of Vienna collection.

Polish Officer, with two handed sword,
ready to lead a his nit

Saturday, 6 January 2024

Battle of Stamford Bridge, 25th September 1066

For the first Friday game of 2024, Mie W staged a refight of Battle of Stamford Bridge in 28mm. The game was hosted at Rupert's and th e rule set was based upon Peter Dennis & Andy Callan's '1066 and all That'.

This game is a follow on from the relatively recent refight of Fuford Gate (see here), in thet the Anglo-Dane & Viking forces were impacted by the losses that they recieved at that earlier meeting.

Anglo-Danish orces pour over Stamford Bridge after making short work of the one 'heroic' Viking.

As such the Viking forces under Harald Hararda and Tosting Godwinson were reduced but not devistatingly so, the only big change being that Jarl Gnvald the Bald had been slain at Fulford Gate and thus his small force was no longer available. Instead the Vikings could call pon their reserves under Eystein Orri, located some 12 milies from the battlefield.

The Vikings were played by Rupert (Harald), Dave (Tostig) and Mat (Eystein Orri), whilst the Anglo-Danes were commnded by John (Harold Godwinson), with the able help of Mark, Mike N (Earl Morcar's Northumbrians) and Phil (Earl Edwin's Mercians).

First stage of the game was the fight to cross the bridge, a lone Viking Hearthguard stood wealding a double handed axe, unlike the historical ledgend, Harold ordered his bowmen to open fire nad teh unfortunate Viking was cut down in a hail of arrows without creating his own ledgend!

The Second stage of the battle was the Anglo Danes marching to deploy in to line of batte, Harold deployed to the left and centre, with Morcar deploying to his far right and Edwin to his immediate right. On each flank were depoyed independent Anglo Danish horsemen, threatening the Viking flanks, forcing their right flank to refuse their line to protect themselves.

The waiting Vikings begin to line-up on the slope northe of the River Derwent

The Vikings had started the game with just Harald and Tostig on the tabletop, accompanied by their bodyguards and Heathguards. During the course of the long Anglo Danish deployement process, they were able to bring additional units onto the field to bolster their lines. Harald was linng up in the centre and left, whlist Tostig was to his right.

The Anglo-Danes doing the same after crossing the bridge.

The Anglo-Danes slowly begin to close on the Viking lines.

Stage Three - the Angle-Danes advanced into contact on their left, with John keen for the fighting to begin. As this was happening Eystein orri's troops began to arrive on the Viking extreme left, a turn or so later Morcar and Edwin's men also engaged along the line, aincluding lead elements of Orri's troops.

Another view of the waiting Viking lines

The Anglo-Danish line as it advances.

Close-up of the Anglo-Danish Horse

Another shot of the Anglo-ane lining out after crossing the bridge