Thursday, 26 March 2015

Last Samurai Costumes

When on a short holiday break in the Isle of Wight, we visited Brading Roman Villa. This was an interesting visit in its own right but it had the added attraction of hosting a touring exhibition of costumes form Tom Cruise's 'The Last Samurai' film.

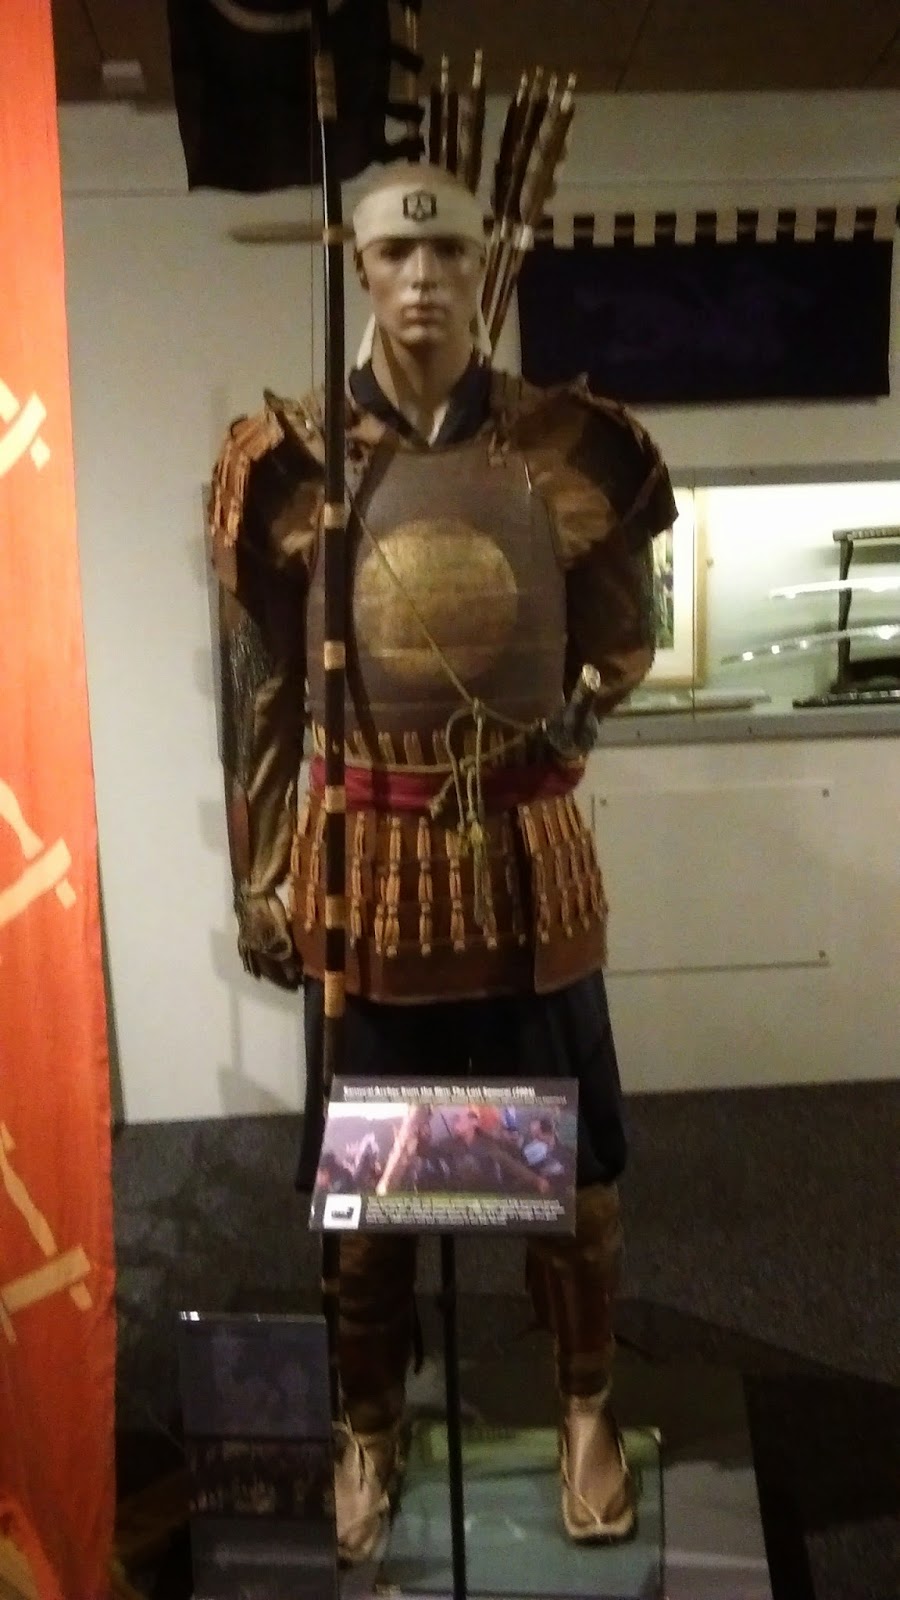
Anyway the purpose of this article s to share photos of the costumes that were on show there,to highlight the detail of the armour and equipment should anyone feel the need to paint-up any Samurai figures at any point.

Whilst the costumes on show were not real Japanese Samurai items, in fact the armour was plastic, it should give folks inspiration with their paintbrushes!


The Red Samurai

Detail of lacing on Back Plates

Detail of lacing on Front Shoulder Plate

The Black Samurai

Detail of waistband and sword

Helmet Detail

Studded Armoured vest

Detail of lacing on armoured vest
Detail of Archer's Quiver
Ninja's Costume

Detail of Archer's Armour
Full length Archer

Monday, 26 January 2015

Battle of Benevento - 26 February 1266


This two week game is the first of a number of Sicilian Vespers related games that are planned to be put on by John. The games will utilise John's extensive 15mm crusades collection but put the figures in a European setting, i.e. Sicily, to make a change form the run of the mill crusaders middle age games.

The Battle of Benevento was fought  in present-da Southern Italy, between the troops of Charles of Anjou and Manfred of Sicily. Manfred's defeat and death resulted in the capture of the Kingdom of Sicily by Charles, effectively ending Hohenstaufen rule in Italy.

Background 
The Papacy had long been in conflict with the German Imperial house of Hohenstaufen over their rule in Italy. At the time of the battle, the Hohenstaufen ruler in the Kingdom of Sicily (which included Sicily and southern Italy) was Manfred, illegitimate son of Frederick II, Holy Roman Emperor. While the rightful heir to the kingdom was Frederick's legitimate grandson Conradin, he was young and safely across the Alps in Bavaria. Taking advantage of a false rumor of Conradin's death, Manfred had usurped the throne in 1258. Pope Urban IV determined to wrench the Kingdom from him, and in 1263, concluded a secret treaty with Charles of Anjou, giving him the Sicilian throne.

The Ghibelline Forces
The Guelph Forces
The Game
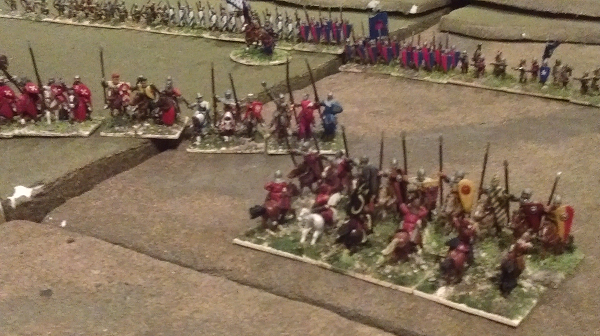
Utilising the club's own Ancients to Middle Ages rule set, the game saw two substancial armied pitted against each other across the tabletop. The Angevin French (Guelph) armies were commanded by Steve, Mike N &

Rupert whilst Mike W & Phil took command of Manfred's Scilian, German & Italian (Ghibelline) forces.

At the outset of the game the Guelph forces had 3 battles on the field, deployed in line across the table. The Ghibelline forces only had two battles on the table and these were deployed one behind the other, Cavalry out front and Infantry behind. Much of the Ghibelline forces were Saracin allies and German mercenaries with a core of Italian knights.

From the outset the Ghibellines, pushed their light cavalry archers out to harass the closing Geulph knights, initially they came off worse, with one unit getting caught and nearly destroyed whilst another fled at the sight of such danger. Luckily these rallied and they were able to slow down the relentless advance.

As the Guelph forces advanced the third Ghibelline battle was able to advance onto the tabletop, formed of Italian & German knights, these joined up with the existing knights on the table and then surged forward to attack the enemy lines.

At the end of the first week it was nip & tuck, the Ghibelline light cavalry is no more but two units of Guelph Sergeants have been broken and the knights continue to fight in the center.

Horse Archers melee with European Sergeants - and loose!


Saturday, 10 January 2015

Battle of Dvinsk - The Counter Attack

Length wise view of the table, showing the three roads
that could form the axis of any Russian Counter Attack.
This is a follow on game from Mike N's Russian Campaign,with week One played out last December, when a surprise German Air Assault,lead by paratroopers stormed the city and captured it in very quick time!

Although the local Red Army elements remained almost intact, the sudden capture of the city meant that most of their Divisional & Corps command and control was taken out...

... as a result the Russan counter attack is piecemeal, with 2 x Infantry Brigades and an Armoured Brigade all making separate attacks against the now German defended city.

A clear view of the width f the table and the road passing the Petrol &
Ammunition Dumps recently capture by the Paratroopers.
In the first week of the counter attacks we see three Russian infantry brigades commanded by Comrade Rupert throw themselves at the German defenses. Now at this stage it should be said that the German High Command was probably lax in their preparations and many of them underestimated the resolve of their foe.

Added to the four battalions of Paratroopers that took the city was a 5th battalion of Air Transport Infantry, who arrived by glider, They were known as the 'Afrika' Battalion due to their originally being modeled as paratroopers for use in North Africa!

Left foreground, the Fuel Dump building
Anyway I digress, Mike W, the commander of the said African Battalion immediately made it known to his superiors that in his opinion the Red Army would take the shortest route into the city, that is from the long table edge, fighting across the width of the table, rather than driving down the length of the table as thought by the incumbent German Command.

Amongst many 'Guffaws', name calling and comments about him only being a 'johnny come lately' colonial commander the defense of the city was planned, assuming an assault down the length of the table.
Two Ammo Dumps and a Fuel Dump - blown to pieces...

Bravely, the 'Afrika' Battalion took up the defense of the Ammunition and Petrol dumps, aiming to head off any potential attack, with a company in each of the Ammunition Dump buildings and one in the Petrol Dump Facility.
Anyways to cut a long story short, Comrade Rupert's Russians attacked the city from the direction predicted by the 'Afrika' Battalion commander and ironically it was the 'Afrika' battalion that had to defend the undefendable...

German troops occupying the city,awaiting the attack.
Figures loaned to John by Pete from bb Wargames
.. with crates of ammunition and drums of petrol staked around them they made short shift of the first Russian infantry battalion wave that flooded against their positions.

Quiet before the storm
However, as the next two Russian battalions moved ever closer under the cover of smoke, the Russian pre-planned rolling barrage erupted over the 'Afrika' battalion positions - First turn it arrived, the entire 2nd company of the 'Afrika' battalion was eliminated along with the building they were occupying (Ammo Dump nearest the Petrol Dump). This left the 1st 'Afrika' company isolated in the furthest and most exposed most Ammo Dump building - unable to retire due to exploding ordinance and unable to exit due to being nearly surrounded by enemy troops, they resolved to fight on. Only a single attached engineer was able to slip away and head back towards the Fuel dump via sheltering craters.

The inevitable happened! and during the next round of the rolling barrage, a number of shells dropped short and blew up the remaining Ammo Dump and all of the Africans isolated company therein.

The remaining 3rd company of the 'Afrika' battalion, in the Fuel Dump, learnt the lesson and exited the facility just in time to avoid being hit by the third round of the rolling barrage and they were able to move out of the predicted line of fire, digging in to inflict revenge on the Red Hordes in coming tame turns.

1st Russian Infantry Brigade, in cover behind hill.
So there ended Week One of the Dvinsk Counter Attack game.

Week two began with the Germans consolidating their positions around the destroyed Ammo & Fuel Dump, utilising the remnants of the 'Afrika' Battalion and elements form various HQ units - primarily 20mm AA Cannons, AT guns and Air Mobile Howitzer units.

2nd Russian Infantry Brigade advance
on to table behind a smoke screen
2nd Russian Infantry Brigade arrive on table
Talk on the German side was as to where the expected 2nd Russian Infantry Brigade would enter the table, as anticipated again by the commander of the 'Afrika' Battalion, it was in support of their 1st Brigade!

This second Infantry Brigade was commander by the wiley Comrade Phil Hardy, renowned for his attacks along the edges of the table, and again he would not disappoint tonight....

Russian bombardment of church and city
After a half-hearted final assault by Rupert's 1st Brigade, which resulted in the loss of another company, the 1st Infantry Brigade spent the rest of the game in cover behind a hill - which was in fact it's objective for the game.

Comrade Phil's approach was much more methodical, utilising his truck mobile troops to make a faster entry on the table, however, the German commander on that flank anticipated this Russian move and deployed a battery of 20mm AA Cannon supported by captured truck mounted Quad HMGs AA vehicles well forward of the Main German Lines to slow down any Russian advance.

More of same...
These advance guns did their job well, forcing the Russians to deploy on foot a lot quicker than they had originally hoped, shooting-up and destroying two companies of infantry plus a number of other assets. The remaining troops then quickly dropped prone, to reduce chances of being hit but in doing so stopped in their tracks - preventing the Russians form gaining a foothold in the albeit wrecked city.

Captured Quad HMG truck at top of picture attacks flank of 2nd Brigade
Amongst the clouds of smoke laid down by the advancing Russians another artillery barrage rolled in - which lasted the rest of the game, dumping terror and damage on the unfortunate Germans in the impact zone.

Ad Hoc defense line of 20mm AA Cannon,
AT guns and 75mm Infantry Support Gun
face off the 2nd Russian brigade
.
Luckily, although the barrage was longer, it caused less damage than the first week, to troops - although the city was again pretty much flattened. The Germans having at least figured out that moving out of the way of the expected barrage was a good way not to get hit!

In the chaos the Russian lead infantry battalion failed a morale test and broke, this severely impacted the confidence of the Russian commanders to be able to take a foot hold in the city - as more German reinforcements poured out of the central areas into the contested flank. That and despite the advance of the Russian Armoured Brigade along the length of the table, (in three separate columns), the Russians decided to pull back and allow them the option of a renewed, better co-ordinated attack on another day.

So ended the game,both side somewhat battered and bruised, though on balance the Germans probably in reasonable shape.

Arrival of the Russian Armoured Brigade's 1st battalion
contested by German AT guns and hidden landmines.
German reinforcements flank the bombardment to bolster the front lines
For those interested the game was run using Rapid Fire rules and using figures from the collections of John Sears (Germans) and Mike Newman (Russians), with additional figures supplied by Pete from BB Wargames in Norfolk and the 'Afrika' Battalion from Andy Flatman's collection.
Additional Armoured Brigade assets arrive on the table

Finally a Russian Heavy Tank Battalion rolls on to the table top.


Saturday, 13 December 2014

1798 Irish Rebellion

Loyalist Militia
Across the British Front lines
Steve put on a battle form the 1798 Irish Rebellion in 6mm, the aim was to tweak his rules prior to a big refight of the battle of Vinegar Hill.

We had the British / Loyalist forces commanded by Mike W, ably supported by Mike N. Their Irish opposition was commanded by Rupert and Phil as 2inC.

Two British Guns
The British / Loyalists formed up in line, with Cavalry on their left flank facing Windmill Hill, to their right were three infantry brigades that stretched across the table. The line was positioned just short of the village and surrounding fields.

The United Irishmen formed up in line,with there two artillery pieces in the centre and the majority of their forces on the right behind Windmill Hill.

Irish regiment charge Loyalist Militia
who refuse their flank in the nick o'time.
The British plan was simple, cavalry to take the hill,the two centre brigades to take the village and the right most brigade to sweep round the Irish right flank and attack their center form behind.

Windmill Hill on the Irish  right
was their strongest position
that's pretty much how the game played out as well! The British / Loyalists lost a Battalion form each of the right most brigades, but these broke through the Irish left very easily wit the support of  effective artillery, breaking every Irish regiment encountered.

On the British left the Windmill Hill position proved a difficult nut to crack but crack it did after artillery support was put in place and infantry assaults went in to support the harder pressed cavalry.

View from behind the British lines
United Irishmen

A good, fun game for the British, play testing the rules, probably not so much fun for the Irish..


British troops facing the United Irishmen

Saturday, 6 December 2014

Polish National Army Museum


Sherman Tank
Some pictures in form the Polish National Army Museum in Warsaw, Dan and Matt (associate members of the SAS) visited here over the weekend, more to be added soon...
Kukus APC, built 1944 for use by Polish
Home Army in Warsaw Uprising


Sunday, 30 November 2014

Rullion Green - 28th Nov 1666

I'd been planning to put on a game to recreate the first of the Covenanter battles from what was known as the 'Killing Times' for quite a while. It was pure fluke that a slot opened up for the game on the 348th anniversary of the actual battle...

... I took the opportunity to field the armies I'd been teasing the club members with over the past couple years as I had been painting them up - namely a Covenanter Army modeled in 28mm and primarily consisting of Warlord Games figures plus a sprinkling of Perry and Renegade characters. Against them were arrayed Charles II's Scots Army consisting primarily of North Star 1672 (ex Copplestone), Front Rank and some Warlord Games Highlanders -again in 28mm.

I also decided to use the game as an opportunity to trial Sam Mustafa's Maurice rules on the club members, these are unique in that they use cards to drive the action on the tabletop. the general opinion after the game was that the rules worked well and it was worth putting on some more games using the rules stem.

Anyway, enough of that, mre about the battle!

Historical Background
The Battle of Rullion Green is significant as the only battle 1666 Covenanter rebellion, also known as the Pentland Rising. It ends the uprising and results in a further 13 years of violent repression against the Covenanters, known as the ‘Killing Times’ culminating in the battles of Drumclog & Bothwell Bridge(1679).

A Covenanter army under the command of Colonel James Wallace had risen in south-west Scotland and had advanced to Edinburgh to attempt to win support, all the while pursued by a Government army sent after them under Sir Thomas Dalziel. At it’s height the rebel army numbered some 3,000 men, however, as November progressed, the rebels faced constant losses of manpower to desertion. The Government finally caught up to the Covenanters at Rullion Green and defeated them after a stiff fight.

From: http://www.thereformation.info/rulliongreen.htm
The Covenanters halted at Colinton, south west of the city, on 27 November. However, no support
was forthcoming from Edinburgh, which was raised in alarm against a rumoured Dutch invasion and Wallace's army reluctantly turned from the capital, wishing to retreat to the safety of the west, their staunchest support base. The way west, however, was blocked by Dalziel's army and the insurgent force headed east and then south toward Biggar via the Linton Road, using the line of the Pentland Hills as cover.

Major General William Drummond, who commanded the vanguard of Dalziel's army, had intended to engage the insurgents outside Edinburgh but upon learning of their directional change, he was able to anticipate their new objective. He intercepted the Covenanter force in Glencorse Parish, where Wallace's army had halted at Rullion Green to rest and to wait for stragglers. Having sighted a small forward party of government cavalry, Wallace arranged his infantry on the eastern slope of Turnhouse Hill flanked on either side by troops of horse.

A skirmish with Dalziel's vangaurd occurred to the north-east of Wallace's main position. Repelling this attack, the Covenanters waited on their strong, high ground as Dalziel's full force assembled across the glen. Once Dalziel's vanguard and his main body of cavalry and infantry were united, they forded the Glencorse River and arrayed themselves against the Covenanters at the bottom of Turnhouse Hill. From this position Dalziel attacked Wallace's left three times, only managing to turn the line in the final attempt by pushing forward his full force along the entirety of Wallace's line.

The Covenanters, unable to reinforce their weak right side and thrown into confusion, broke and fled into the night.

The Participants

Sir Thomas Dalziel had a long and illustrious military career behind him by the time of Rullion Green. He accompanied Charles I to La Rochelle in 1628 to aid the Huguenots at the age of 13, fought on the Royalist side through the Wars of the Three Kingdoms in Ulster and was captured at the Battle of Worcester in 1651.

He had to flee Scotland in 1654 after being involved in a Highland rising against Cromwell after which a price of 200 guineas was offered for him dead or alive. He went to Russia and saw service for the Tsar of Russia in the Russo-Polish War and against the Turks and the Tartars.

He returned to Scotland on the restoration of Charles II in 1660, becoming Commander-in-Chief of the army in Scotland in 1666 with orders to suppress the Covenanters.

His actions in the wake of the Pentland Rising earned him the sobriquet 'Bluidy Tam'. According to one story, Sir Thomas on one occasion played cards with the Devil and won.

He was replaced as Commander-in-Chief by the Duke of Monmouth in 1679, and despite being reinstated by Charles II, did not appear at the Battle of Bothwell Bridge until after the fighting was over.

In 1681, he was the first Colonel of the Royal Scots Greys Regiment, which was originally constituted as a dragoon regiment.

Colonel James Wallace, commander of the Covenanter forces at Rullion Green, also had a long military career, first serving in the Parliamentarian and then Covenanter armies during the Wars of the Three Kingdoms.

He was captured during the Battle of Kilsyth in 1645 while fighting against Montrose and then again at the Battle of Dunbar in 1650, where he was serving in the Scottish army of the restored Charles II.

The Pentland Rising brought Wallace out of retirement and after escaping the field of Rullion Green, he went into exile in Holland, where he died in 1678.

Covenanter Forces
C-in-C: Colonel James Wallace
2-in-C: Major Joseph Learmont

2 Troops Dumfries Horse
1 Troop Ayrshire Horse
1 Troop Lanarkshire Horse

1 Regiment of Dumfries Foote
1 Regiment of Renfrewshire Foote
1 Regiment of Ayrshire Foote
1 Regiment of Lanarkshire Foote

1 Frame Gun

5 Fanatics

3 Clergy

The quality of each Troop or Regiment will not become evident until it first becomes engaged with the Royalist forces arrayed against it.

At worst these units will be comparable to Royalist Militia, at best they will be equivalent to Royalist Regulars.

All forces should be deployed on the table top at the start of the game, the Frame gun, once placed cannot be moved, although it may be protected by gabions.

Fanatics are armed with ‘Grenadoes’, one or more may be placed in any or all of the Regiments of Foote, if the enemy comes within 6 inches of the regiment the fanatics in that regiment will immediately rush out and conduct grenade attacks against the enemy unit. After the attack the fanatics are eliminated from the game.

Clergy can be allocated to Regiments of Foote, Troops of Horse or to Commanders / Officers to give them spiritual guidance. Details of which will be revealed once the game begins….

Your aim is to hold on until darkness falls, give the Royal Army a bloody nose and then under cover of that darkness your small army can slip away and fight another day. 2VP for each enemy unit that is broken, 1 VP for each of your own units that survive on the hill until nightfall.

Covenanter Foote should deploy in the darkest shaded fields, horse in the medium shaded fields.Government Forces may only deploy in any of the lightest shaded fields.  All re-enforcements arrive by Crawley Cottages. Shading represents higher, rougher ground. The higher and rougher the more advantageous for Infantry to defend and worst for Horse.

Government Forces

C-in-C: General  ‘Tam’ Dalziel of Binns
2-in-C: Maj-General William Drummond

1 Troop of Life Guards
2 Troops Oxford Horse
2 Troops Lowland Dragoons
1 Militia Troop 

2 Regiments English Foote
1 Regiment Scots Foote
1 Regiment Highland Foote
1 Regiment Scots Militia

1 Scots Gunne
1 English Gunne
1 Marksman

By the grace of his majesty King Charles II, you have been placed in command of his Royal Army in Scotland to suppress this rebellion.

You have been pursuing the rebellious scum for nearly two weeks, your forces strengthening as you go but their leader, one James Wallace, has proved to be a slippery devil.

Finally you have cornered the rebel forces by the small village of  Rullion Green, it is mid-day, to pin the rebels in place you’ve dispatched your vanguard consisting of your Horse & Dragoons, under your second in command William Drummond.

As such you must deploy your Horse & Dragoons on the table-top at the start of the game.

An order of march must be set-up for your Regiments of Foote & Gunnes, as these will arrive during the course of the aftrernoon. All troops will arrive along the Glencourse Road to your rear.

The Marksman is a member of one of your Regiments of Foote, he has the ability of attempting to kill a rebel officer if they come within range, once used he is eliminated.

Hurry, you have limited time, it is late November and light will be fading and the rebels will melt away into the hills, to win you must destroy the rebel force. You gain 3VP for each enemy unit that is broken, plus 1 VP for each Rebel Notable killed or captured.