Sunday 5 July 2015

Punic Wars - Night Raid on Carthaginian Camp

Friday night saw the continuation of Rupert's Punic War campaign, after a somewhat dormant period, with the Romans in North Africa, sallying out in strength to raid the Carthaginian forces that were besieging their positions.

Initial set-ups saw the Carthaginians, asleep in their beds within the camp walls (red units, in the grey squares on map to left) with cavalry, heavy & light infantry dispersed across the camp.

The Roman (blue units) forces lined-up with 5 legions in the centre, screened by some light infantry, then on each near flank more light infantry plus heavy cavalry on each remote flank.

At this point it should be noted that each Carthaginian unit would check each turn to see if it 'wakes-up', whilst unwoken the unit cannot move and is considered disordered if attacked.

The terrain was unknown to the Romans, but known to the Carthaginians, that shown in yellow was all they were certain of, being clear terrain. All green squares were split into quarters with a one in six chance of bad terrain in each quarter of a tile.

The final scenario special rule was that given this is a night raid, the game is played with all units limited to 8" moves, only reverting to full moves again once daylight arrives on turn 21!

'Michaelus Maximus Meridians' was Commander of the Roman Army and the African Legions, loyal servant to the Emperor. Commander of the Carthaginians was one of Hannibal's minions...
 

the heght of teh battle, Carthaginians make a stand within the camp
as routers pass them by as the the Romans hesitate
The Carthaginians, not knowing where the Romans might attack from, were distributed around their camp, whilst the Roman plan was simple, a concentrated hammer blow at one end of the enemy camp. With luck, the Roman's would be into the camp quickly, hitting units before they wake and drive defeated units back through the camp, preventing any reinforcements hampering the Roman advance.

The Roman legions cracked-on once the game started, moving across the cream terrain at 6" per turn. The Carthaginians managed to wake some light infantry and cavalry, which were thrown forward to delay the advancing legions, which they managed to do for a few turns, albeit that they were driven back to the camp walls each turn.

Carthaginians streaming out of the camp's rear gates in a state of rout.
Eventually the light infantry broke, allowing the legions to surge into the camp, meanwhile on the Roman left flank the light infantry and cavalry were able to start tracking around the flank of the camp. On their right flank, the light infantry ran into bad ground, though the heavy cavalry were able to move on and check emerging Carthaginian light cavalry that had left the camp.

Then after morale checks, additional Carthaginian units began to break, all of a sudden half of the Carthaginian camp was in rout. Then the Roman forces frozen, not gaining enough command factors, two turns in a row, to move any units. In that time the Carthaginian routers cleared much of the camp and a number of units rallied.

The Romans pressed on, engaging with Carthaginian heavy infantry, several rounds of melee continued with the Romans wearing down their opponents and breaking one then two heavy infantry units.
The roman 3rd legion were battered by Carthaginian units and evenually broke.

On the flanks, Carthaginian cavalry broke the Roman light infantry on the Roman right flank, in turn the Roman heavy horse pushed forward and finally broke one of the enemy light horse. On the Roman left flank, the lights flanked and attacked advancing Carthaginian units whilst the Roman heavy horse, crashed into the rear of the camp.

More Carthaginians routers
As day broke in the game (turn 2) we reached the end of the night,the game had been planned a s a 2 week affair but there wasn't enough of a game left to allow for a second week. the Carthaginians had two heavy infantry units engaged with a veteran legion and one of these had just been hit in the flank by a fresh Roman legion, both the Carthaginian units had reached zero cohesion points and would break soon.

It was left to Rupert as umpire to deliberate the impact on the campaign,this will be communicated to the commanders in due course. An enjoyable game that a number of 'nip & tucks' / 'to and fros' despite the apparent one sided nature of the game.

Thursday 2 July 2015

Regiment d'Auvergne - 1672

Latest French Louis XIV regiment off the workbench is another of the 'Vieux Regiments,, that of Regiment d'Auvergne. The regiment originally came into being in 1635, being formed from the earlier Regiment Du Bourg de Lespinasse which was raised in 1597.

Click pictures to enlarge

As with all Franco-Dutch wars uniforms, details are sketchy at best. The exact colour of the facings is in some doubt, being possibly various shades of blue but shown on a number of later pictures as a blue / purple. I have taken the liberty of going with purple to match the regiment's colours.

Figures are 28mm North Star.

Thursday 18 June 2015

Waterloo Lite


My, my, at Waterloo Napoleon did surrender

Oh yeah, and I have met my destiny in quite a similar way
The history book on the shelf
Is always repeating itself

Waterloo - I was defeated, you won the war
Waterloo - Promise to love you for ever more
Waterloo - Couldn't escape if I wanted to
Waterloo - Knowing my fate is to be with you
Waterloo - Finally facing my Waterloo

My, my, I tried to hold you back but you were stronger
Oh yeah, and now it seems my only chance is giving up the fight
And how could I ever refuse
I feel like I win when I lose

Waterloo - I was defeated, you won the war
Waterloo - Promise to love you for ever more
Waterloo - Couldn't escape if I wanted to
Waterloo - Knowing my fate is to be with you
Waterloo - Finally facing my Waterloo

So how could I ever refuse
I feel like I win when I lose -

Waterloo - Couldn't escape if I wanted to
Waterloo - Knowing my fate is to be with you
Waterloo - Finally facing my Waterloo


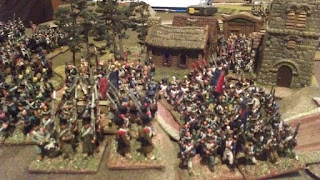
Unlike the historical battle, in this re-fight of Waterloo the French open the game with a strong thrust down their right flank, focusing their attack on the village of Papelotte,leaving their left flank largely uncovered as far as the defending Allied troops in Hougomont could see...

The wilderness that this the Hougomont flank of the battlefield

French infantry and supporting cavalry advance on Papelotte.


The advancing French columns crash through the village of Papelotte,which is defended by Brunswickers, Nassau and some British troops.


Brunswickers of the 'Black Legion' attempt to halt
the flood of French columns at Papelotte

French forces swarm past the village Papelotte.


After taking Papelotte the French unleash a second infantry column on the Allied centre, driving the British from La Haye Saint after a brisk assault.

French infantry columns attack La Haye Sainte,
supported by massed artillery batteries...
... and within the walls of La Haye Sainte, the lone British
battalion awaiting the fury of the French onslaught!

Late in the day Prussian forces begin to arrive on the French right,between Papelotte and Plancenoit, in response the French deploy the Imperial Guard which assaults the advancing Prussian columns with repeated, effective cavalry attacks whilst their infantry deploys.


See our Waterloo Photos <Here>

Wednesday 13 May 2015

The Battle of Vinegar Hill 21st June 1798 - Part One


When in 1998, whilst visiting relatives in Ireland, I set my eyes upon “The year of Liberty - The great Irish rebellion of 1798” I knew I was going to be hooked on the subject.  Over the years the members of our club have put up with this obsession of mine and together we’ve fought most of the major engagements on the wargames table, all except Vinegar Hill.  This is mainly because I’ve had to wait until my figure collection was big enough and also due to the fact that I wanted to construct a purpose built hill for the occasion.  Well not so much a hill but the entire area around Enniscorthy where the battle was fought so that it would fit on a 12ft x 6ft table.

The upshot of all of this has been a 3 week epic game that nearly but not quite turned the tables on history.  So here it is the full autopsy of the battle of vinegar hill.

Background to the battle
In the late 1790’s the movement known as the United Irishmen (UI) had flourished as a political movement but because of its sympathies towards the emancipation of Irish Catholics it was forced to become an armed underground movement.

In December 1796 the French attempted to land 15,000 troops at Bantry bay in an effort to support a planned rising by the United Irishmen but the landing failed due to a winter storm and the rising was aborted.

The Irish Government, now unnerved by the fact that they could have had an armed insurrection on their hands, went to extreme lengths to find out who the rebel leaders were and over the next 18 months also attempted to suppress the movement.  Through a combination of torturing suspects and the free quartering troops, which became known as the “Dragooning of Ulster”, it revealed large arsenals of Muskets and Pikes that the rebels had been stock piling and it looked like the movement was on the verge of collapse.  With most of the leadership in prison and in an act of desperation the remaining council members launched what was initially a limited and uncoordinated rising in the eastern counties of Ireland.

The initial outbreak started on 23rd May and was confined to a ring of counties surrounding Dublin.  Crown forces had largely suppressed these and secured the capital when news arrived on 29th May that County Wexford had risen.  1000 rebels had routed 100 men of the North Cork Militia in an open engagement at Oulart hill.  This small victory was enough to swell their ranks to some 15,000.  The outbreak was unexpected because the government had thought that Wexford was an inactive county and thus the garrison had only numbered a few hundred men.

Under the command of Father Murphy the rebel army stormed the town of Enniscorthy and then after destroying a relief column sent from Duncannon fort at the battle of Three rocks, captured the administrative centre of Wexford, Wexford town.  The fall of Wexford was the highpoint of the rebellion with the UI ranks estimated to have swollen to over 35,000.

Whilst the outbreak in Wexford had been going on the commander in Chief of Ireland General Lake had been contending with yet another outbreak, this time in the North of Ireland because in early June Ulster rose.  Culminating at the battle of Ballynahinch the rebels were defeated allowing General Lake to concentrate all his efforts on crushing the rebellion in Wexford.

During this period the rebel' campaign in Wexford had met with devastating defeats at New Ross, Arklow and Newtownbarry and these had the effect of corralling them within the county.  However, the rebels were still in a strong position holding their own against continued attempts by the Crown Forces to break into County Wexford such as at the battles of Tuberneering and Foulksmill.

In the absence of their commander in Chief, the Reverend Philip Roche who was fighting in the west of county Wexford, the rebel council in Wexford town determined that the only way to settle matters was to have a major confrontation with the crown forces that were mustering on the borders of Wexford and it was decided that a stand would be made on Vinegar Hill.  The decision to withdraw troops from the borders of Wexford was seen by many as the wrong thing to do but even after much opposition the decision made by the council prevailed and the army was ordered to fall back.  This manoeuvre effectively lost all the gains the rebels had made in Wexford and would allow the Crown Forces to advance unchallenged.

In the mean time General Lake had been formulating a plan in which six Brigades would “Beat the rebels before them as on a grouse shoot then surround and destroy them”.  Misinterpreting the rebel withdrawal to Vinegar Hill as an all out retreat General Lake must have thought that his plan had had an almost immediate effect without his men even firing a shot.

General Lake was confident that a well disciplined military force could easily beat an undisciplined “rabble” as had already been seen during previous engagements early on in the campaign at Antrim, Ballynahinch and Tara Hill where the Rebels had melted away once they came under organized Artillery and volley fire.

However, the United Irish in Wexford had had a month of continuous fighting in which to hone their military skills and they weren’t the undisciplined rabble that Lake perceived them to be.  For the United Irish the battle of Vinegar hill was not about holding onto the hill but about defeating the crown forces in one last great battle and from this point on I shall move away from the historical account and explain how the game unfolded.

During this narrative you shall here me refer to the “English” as Crown forces.  I’ve done this because firstly Ireland was not part of the Union at this point in time and secondly there were very few English troops involved most of them being Scottish Fencible units, Irish Militia or Yeomanry.

by Steve Cast

Bibliography

The Wexford rising in 1798.  It’s causes and course
Charles Dickenson
ISBN 0-09-478390-X

Ireland 1798 the battles
Art Kavanagh
ISBN 0-9524785-4-4

The memoirs of Myles Byrne Vol 1
Myles Byrne
ISBN 978-1110971879

The Irish Militia 1793 – 1802.  Irelands forgotten army
Ivan F. nelson
ISBN 9-781846-82073

An Ascendancy Army.  The Irish Yeomanry 1796 - 1834
Allan Blackstock
ISBN 1-85182-329-8

The year of Liberty.  The great Irish rebellion of 1798
Thomas Pakenman
ISBN 1-85799-050-1

The year of Liberty.  The great Irish rebellion of 1798 illustrated edition
Thomas Pakenman
ISBN 0-297-82386-8

Royal Irish regiment of Artillery
Major J.J Crooks
ISBN 9-78184-5741-730

The Wexford insurgents of ’98 and their march into Meath
Eamon Doyle
No ISBN

The Battle of Vinegar Hill 21st June 1798 - Part Two

The Game
Before I continue I should explain that the game was not wholly historically accurate.  This was done on purpose firstly to stop players from using historical accounts to work out their opponent’s strengths and weaknesses and to give players a bit of self determination in their deployment and Order Of Battle (ORBAT).  One thing that did reflect history was the deployment areas of the Crown forces.

Army organisations

Crown Forces
Instead of the umpire allocating troops to their historical commanders the players, acting within General Lakes original plan of forming six Brigades, were allowed to allocate whatever troops they liked to whatever commander they liked within the following confines:

Each brigade had to have a minimum of:

2 battalions of Infantry
1 Squadron of cavalry
1 division of Field Artillery (2 guns)

Battalion guns could be allocated as players wished

The commanders for each Brigade are listed below but General Lake was not allowed to form his own Brigade and had to be part of Dundas’s Brigade.

General Gerard Lake
Major General David Dundas
Major General Francis Needham
Major General William Loftus
Major General James Duff
Major General John Moore
Major General Henry Johnson

Pre-game bombardment

At the start of the game the Crown players were given the choice of having an 8 turn (two hour) window in which to initiate a pre game bombardment on the rebel positions.  This was to represent Lakes bombardment of the hill and Enniscorthy before the battle commenced.  This option was declined by the players on the grounds that it would waste ammunition but in doing this it was to have a detrimental effect on their plans.

United Irish Forces

Organisation
The same free format allocation of troops applied to the UI players.  They had to form their army into five Brigades of any size under the following commanders:

Anthony Perry
Father John Murphy
Myles Byrne
William Barker
Father Mogue Kearns

What they didn’t know was that Father Philip Roche’s forces (At Foulksmill) had already been allocated by the umpire and would turn up later on in the game.


Players were then asked to refer to the strategic map below so that they would understand their initial dispositions and then the tactical map for deployment on the table.

For those of you who know the battle of Vinegar Hill you may have seen a few historical “anomalies” reflected on the map.  Again this was done on purpose to throw any would be researchers off the trail.

Historical changes to the game

1. Historical scenario
After their victory over the rebel forces at the battle of New Ross Major Generals Moore and Johnston were ordered to march on Vinegar hill and attack the town of Enniscorthy.  However Moore was then ordered to join up with the garrison at Duncannon so Johnston continued his march to Enniscorthy alone.  After the garrison failed to rendezvous with Moore he decided to march on to Taghmon but upon reaching Foulksmill Moore encountered a large force of rebels under the command of the Reverend Philip Roche.  With the ensuing battle ending in a stalemate the rebels withdrew after which Moore heard that there were loyalist prisoners held in the gaol at Wexford so he diverted his force to relieve the town.

Change
In this scenario the order for Moore to go to Duncannon is never sent so both Moore and Johnston march on Enniscorthy as originally planned.

2. Historical scenario
After his defeat at the battle of New Ross the Reverend Philip Roche initially fell back to a camp at Sliabh Coillte then later on fell back to the camp at Three Rocks near Wexford town.  On hearing that General Moore was heading toward Foulksmill Roche took 5,000 men and attacked him.  After a stalemate Roche fell back on Wexford thinking that he was being pursued by Moore.  After reaching Wexford he then marched to Vinegar Hill arriving just in time to stave off an attack by General Needham on the retreating rebels.

Change
In this scenario because Moore doesn’t reach Folkesmill Roche heads towards Wexford on the 20th and by the 21st he’s ready to advance on Vinegar Hill with reinforcements from the Wexford garrison.

3. Historical scenario
Because of a major administrative blunder which meant that General Needham had to march all through the night he didn’t arrive at his station at Oulart Hill until late in the morning of the 21st having been inadvertently diverted many miles out of his way by General Lake.  On arrival at Oulart Hill Needham’s infantry were completely shattered so he advanced on Vinegar hill with only his cavalry, arriving just in time to bump into Roche.

Change
In this scenario Needham is still late but he turns up with all of his men albeit pretty exhausted and with lots of disadvantageous tactical factors to impede him.  It also meant that any troops allocated to Needham’s command would also be delayed a lot longer than anticipated.

The Battle of Vinegar Hill 21st June 1798 - Part Three

ORBATS after player allocation

Now, the total number of men shown probably isn’t 100% accurate but as with most historical research of this period it depends upon what you read and a lot of it is subjective so if you like we can agree to disagree.

There isn’t that much solid information concerning what units were present at vinegar Hill so I’ve worked things back and looked at the forces involved in previous battles such as New Ross, Arklow, Tubberneering, Foulksmill etc and then hypothesised on what reinforcements could have been sent after these battles.  For example we know that Needham’s force was reinforced from Dublin after the battle of Arklow and that reinforcements were sent during the battle of New Ross from Waterford, albeit they retreated back to Waterford as soon as they saw that Johnson had been booted out of the town but they turn up again after the battle.

As for the UI forces, again we know that on the eve of New Ross politics interfered and half of Bangel Harveys force decided to quit the field due to the fact that they didn’t like his plan.  Even though we’re not sure where these men went they could easily have gone back to either Wexford or Enniscorthy.

So on that basis I went for the higher numbers I’ve read of if nothing more than to give more of a spectacle on the table.

Crown Forces

General Gerard Lake and Major General David Dundas (5,500 men)
10 units of Line Infantry
4 troops of Yeomanry
6 pieces of Field Artillery
4 battalion Guns

Major General William Loftus (1,200 men)
2 units of Line Infantry
2 troops of Heavy Dragoons
2 Pieces of Field Artillery
1 battalion Gun

Major General James Duff (1,300 men)
2 units of Line Infantry
4 troops of Light Dragoons
2 Pieces of Field Artillery
1 battalion Gun

Major General John Moore (1,900 men)
4 units of line infantry
2 troops of yeomanry
2 Pieces of Field Artillery

Major General Henry Johnson (2,150)
4 units of line infantry
3 troops of Yeomanry
2 Pieces of Field Artillery
1 battalion Gun
(Off table)

Major General Francis Needham (4,450 men)
8 units of line infantry
7 troops of Heavy Dragoons
8 troops of Fencible cavalry

Total = 16,500 men

United Irish Forces

Note: Captured field artillery is that captured at the battle of Three Rocks on 30th May.

Anthony Perry - 2nd in Command (5,200 men)
6 units of pikemen
2 units of guns men
1 Piece of captured Field Artillery
1 Curricle or improvised gun

Father John Murphy (5,400 men)
6 units of pikemen
1 unit of guns men
1 Piece of captured Field Artillery
1 Curricle gun

Myles Byrne (5,200 men)
6 units of pikemen
1 unit of guns men
2 Pieces of captured Field Artillery
1 Curricle or improvised gun

William Barker (5,300 men)
6 units of pikemen
2 units of guns men
2 Piece of captured Field Artillery
1 Curricle or improvised gun

Father Mogue Kearns (4,300 men)
5 units of pikemen
1 unit of guns men
3 Curricle or improvised guns

Off Table (Umpire Allocated force)

Father Philip Roche - Army Commander (7,100 men)
7 units of pikemen
5 units of guns men

Total 32,500 men

Objectives

Victory conditions were in the hands of the United Irish players and I gave them two options to choose from to try to simulate the historical point at which the United Irish leaders were making their decision to either leave the battlefield or carry on fighting.

Mandatory Objective

Stay on the table until a minimum of 6 of your Pike units are beyond the point of rallying then commit yourselves to ONE of the options below:

Option 1
Stay on the table and continue fighting.  However to ensure complete victory you will need a kill ratio of approximately 3:1.

Option 2
Start to withdraw units off of the table through any favourable exit to the south.  Every unit of Foot or Artillery that is under control and gets off of the table will help offset your losses and therefore increase your chance of victory.

The Battle of Vinegar Hill 21st June 1798 - Part Four

The Rules
The rules that I used were home grown because none of the Commercial of The Shelf Sets gave the right feel to the period and there were many specifics that weren’t even considered.  They’re an amalgamation of ideas taken from Shako, Principles of War, WRG 1685 – 1845, and some period specifics thrown in by myself.


I’ve called them “She’s stopt boys….” after a famous incident during the battle of New Ross when an Irish rebel supposedly put his hat over a cannon that had been impeding the Irish advance shouting “She’s stopt boys….”, upon which the gunner put lintstock to touch hole and blew him away!

They work pretty well, give the right feel to the game and they flow well.  Vinegar Hill took around 11 hours to play out and had 127 units (435 elements) and 2034 figures, so not bad for a game of that size.

Each unit is broken down into elements and apart from Artillery each element is the same width and depth, 1 ½”x ½” the ground scale being 1” to 20 yards.  The depth is over scale but is necessary to accommodate the figures.

The number of figures on each element is purely aesthetic as these rules don’t work to a figure scale.  Much like POW, casualties are recorded on a casualty sheet which in this case each box representing 25 men.

UI Pike elements represent 200 men in four close order ranks
UI guns men elements represent 50 men in skirmish order

Crown infantry elements represent 100 men in two close order ranks 
Crown Cavalry elements represent a troop of 50 men in two close order ranks

Field Artillery which is 1” width x 3” depth, represent one 6lb cannon or one 
5½” Howitzer, the accompanying limber, ammunition wagon and the 36 servers and crew.  In the case of captured Artillery used by the UI the crew are untrained and a lot less in number.

Battalion guns are 1” x 1” and represent 1 gun with four trained infantry crew.

UI Curricle or improvised artillery such as the many swivel guns that appear to have been used are as above but with untrained crew.


The Battle of Vinegar Hill 21st June 1798 - Part Five

The Battle
Instead of me writing reams more I shall instead show the battle in map form at various stages of the game because as they say “a picture paints a thousand words”.  As you look at the maps it may appear that the Crown had the better of it but after looking at the casualty returns Lakes wing was on the verge of collapse.  The game lasted 32 moves with each move representing 15 minutes of real time.

Photo’s of the game will soon be available <here>.


Overview of the battlefield.


For the topography I’d scanned in the area of the battlefield from an Irish Ordnance survey map of county Wexford.  I have many such maps covering the main theatres of operation during the conflict.  The size of Enniscorthy was deduced from looking at the Irish Ordnance survey – Historical mapping section on their web site.  They have maps going back as far as 1830.  I’d encourage anyone interested in wargaming Irelands turbulent past to use both of these forms of media to get a good idea of the terrain that these battles were fought over.


Initial deployment


3am to 4am The UI come off of the hill to engage Lake realising to late that Duff and Loftus are approaching from the North.  Johnson and Moore attack Enniscorthy where murderous street fighting ensues.


4am to 5am After severe hand to hand fighting Lakes left flank collapses with his centre and right coming under intense pressure from Byrnes and Murphy with reoccurring melees all along the line.  He loses two pieces of artillery from accurate and sustained fire from UI Guns men.  Duff and Loftus keep Perry at bay by deploying their cavalry to threaten his rear allowing their Artillery and muskets to tear into his stolid ranks.  Sustaining heavy casualties Johnston and Moore slowly push Kearns out of Enniscorthy.


5am to 6am After nearly breaking Lakes centre Murphy’s now spent troops collapse allowing Lake to bring his remaining artillery back into action.  These along with withering musket fire tear into Murphy’s remaining troops stopping them from closing.  Barkers troops remain on the other side of the river unable to deploy due to a lack of room.  Much to the annoyance of Lake Bynes manages to overrun his Brandy cabinet ensuring that after dinner cigars will not be part of this evening’s entertainment.  Perry continues to take a terrible pounding from Loftus and Duff but refuses to budge.  Having taken the western part of the Town Johnston and Moore try to dislodge Kearns remaining men by bombarding the east side of Enniscorthy.


6am to 7am  Infuriated by the loss of his Brandy Cabinet Lake brings up his other two pieces of Artillery.  Along with the remaining troops on his right flank he begins to tear holes in Byrnes command.  What’s left of his centre continues to hold Murphy off with sustained volley fire.  Having expended nearly their entire stock of canister, but much to the relief of Loftus and Duff, Perry’s command eventually collapses.  Cacking their pants the UI artillery realise that Needham’s cavalry has turned up in their rear.  However, to thwart Needhams plans Roche also makes an appearance.


7am to 8am After a hard fought fight what remains of Murphy’s command breaks giving Barker the opportunity to get to grips with Lake.  Needham’s Cavalry chop half of the UI artillery to dog meat with every intent of finishing the job as soon as they can.  Needham’s infantry turn up forcing Roche to split his command in two and negating any further advance.  Byrne continues to poke the eye of Lake by drinking yet more of his Brandy whilst his men frustrate Lakes attempts to force them off the hill.  Johnston and Moore continue to pound Enniscorthy.  Loftus and Duff start their advance into the rear of the UI forces


8am to 9am having had enough of Lakes Brandy and his fill of “grape” quits the field.  Having finished off the UI Artillery Needham’s cavalry inhibits Roche’s advance any further.  Taking sustained artillery fire Roches men hold their ground allowing what remains of the Wexford army to retreat in good order.


9am to 10am It’s all over for the UI who head back to Wexford to plan the next phase of their campaign against the Crown whilst Lake licks his wounds and drowns his sorrows in what’s left of his Brandy.


Sunday 26 April 2015

Painting 28mm 17th Century Lowland Scots - Part Three

Stage 6
Figures after dip has dried,very glossy and not looking that good!
You'll note I glue figures to their final bases before applying dip.
There re many other places in the internet where you can read-up on the Army Painter 'Shading' products, so I'll not bore you with a rehash of all those. <try here as a start>

All I can say is that after experimenting with the product for a number of years and becoming more and ore familiar with it - I love it!

I have a couple of tips that I'll share - I always use 'Dark Shade',my preference,this is the one that uses black as the pigmentation - the other two uses browns.

Next always keep it indoors and the lid well sealed, the product doesn't like the changes in temperature it'll experience out in  ashed or garage.

The product is Oil based - so it smells and requires 24 hours to dry. Tempting as it s to fiddle with the figures before it is dry - don't! You'll also need white spirit or similar to clean your brushes.

This leads to my final tip - the product is described as a dip, don't dip your figures! Paint on the product with a largish brush and work a generous amount into all the nooks and crannies of your figure. 

When satisfied move on to the next figure and then the next.

After the third figure, go back to the first, you'll see the shading product will have started to do its magic - with a critical eye - look for whee the product has started to pool or is obscuring important detail on the figure and correct this with your brush. Then put the figure aside to dry for 24 hours....

Stage 7
Sand and electrostatic grass added to bases,
Sergeant & Musketeer plus Pikeman Base
You're on the home leg now, before applying the dip you'll note that I glue the figures on to their final wargaming bases, any dip that flows off the figure will help fix it to it's base! These bases have been scored with a modelling knife, prior to fixing figures to help glues and paint 'key' to them.
Same treatment for command bases.

Once the Amy Painter Shading product has dried, I will then start the basing process - use filler applied with those small wooden coffee stir-sticks found at McDonalds or other such places. this will take a couple hours to dry but gives a good even surface to apply the next layer of paint.

I use emulsion paint than can be obtained from any DIY store, usually from sample pots which come  many colours - though i use a brown based paint for earth - which seems the obvious choice for me. When first opening the pot, I'll immediately top it up to the top with PVA wood glue, to make it better for sticking basing materials to. I regularly top up the pot with more PVA glue as I use up the paint.


Grass tufts and other scenics added to bases

I paint the whole base and whilst still wet I cover the surface with fine sand and leave to dry. Next I'll apply patches of the same paint to the base and then cover base with electro-static grass, before shaking off the excess - again leave to dry.

Finally apply various grass tufts and other ground vegetation to taste.

I'll now add the unit's flags to the officers - maybe a separate article on how I make these sometime (pretty much always print out on my home printer and apply with PVA wood glue).
Figures after final Matt Varnish spray
Not only does the Matt Varnish finish ff the figures
it sets the scenics in place as well.

The final step when all is good and dry is to spray paint the whole unit with Mat Varnish,  use Army Painter Matt Varnish as it is easy to find. I spray on sunny days only after a good shake of the can. Weather does effect the final finish of the spray varnish as does lack of shaking...

... Cover the figures from each direction - I do four sweeps to get each side, front and back and again leave to dry and stop smelling.

In my opinion the figures turn out pretty well ...


Figures en-mass, representing Grant of Grants' Lowland Regiment.

Saturday 25 April 2015

Painting 28mm 17th Century Lowland Scots - Part Two


Stage 3
So here's where things start to get interesting, the colour 'red' has always been a challenge to me in painting terms. It may just be me but I have found it difficult to find a good red paint that covers the surface of a model,giving the right amount of vivid colour and the capacity to provide opaqueness and pigment in enough depth to avoid having to do several coats of paint. 

Musketeers and Pikeman in Scarlet Coats
Any way after years of trying different manufacturers I now always use Citadel red paints, on these models I have used 'Evil Sunz Scarlet' and 'Wazdakka Red' The rank and file are done in the brighter Scarlet colour but I have used the darker red colour on officers, sergeant an drummer to give an indication that these figures are wearing a better quality cloth.
Officers and Sergeant in Red Coats
As with other stages the key thing here is to apply the paint as neatly as possible, avoiding splashes of colour on areas that have already been painted or are about to be painted. That said don't worry if this happens, it will but being careful saves time later....

After the red coats are painted in then I add in a dark brown for the musketeer's weapons and a light
Wood is coloured in for musketeers and pikemen
yellow paint I got from Army Painter to represent the pike, flag and Halberd shafts which would have bee stripped ash or similar wood in real life.  The dark brown, I also used to paint the handles of swords and any bayonets modeled on the figures.

Finally at this stage I add in flesh tones for faces and hands, using a fast running out supply of Citadel 'Dwarf Flesh' paint. This flesh colour does dry to distinctive shade, but as I will be using the Army Painter shading varnish,this colour will be toned down to a more natural colour.

Officers and Sergeant with pole arm shafts painted 
It is also worth pointing out that the same is true for all colours used on these figures, once the shading varnish is applied all colours will be muted somewhat, so what appears to be a very bright scarlet coat will be less in your face once shaded....

At this point I put the figures to one side to dry over night. Another thing about red paint is that it tends to bleed into colours painted over it, 24 hours drying time prevents this from happening.

Stage 4

Men with Buff Leatherwork and dark brown shoes & Scabbard detail added 
Once thoroughly dried It s now time to paint in the buff leatherwork on the figures. For musketeers this is the hardness for the 'ten apostles', bullet pouches and leather straps for the powder horn. For most other figures this is limited to scabbard fobs, waist belts and shoulder straps etc.Again the key here is to take a little time to be neat and tidy.

Next on the list is to paint in the metalwork,musket barrel, matchlocks and pike & halberd heads etc. I use a Citadel 'Mithrel Silver' paint for this and rely on the Amy Painter to tone this down appropriately when this is applied.

Sam stage for Sergeant and Officers
The biggest chore ranking alongside the 'ten apostles' for this period is the coat buttons, upwards of a dozen to do on some figures. The answer is to take your time, use a fine brush and ensure you have enough paint on the brush to get each button first time. I find I make most mistakes on buttons when I have to go back to complete a partial button or I have too much paint on the brush to start with. You will miss some, you will get silver on the coat but just correct it later and relax.

Buttons and other metal work added and 'fixes' applied to earlier mistakes1
On the officers I painted their braid Gunmetal - to give it a contrast to the silver buttons, for teh sergeant and the drummer I did their braid in white to reflect their lower rank.

Again same stage for Command Group
The final piece of the jigsaw at this stage is to add in colouring for shoes, scabbards and powder flasks. For this I use Citadel 'Rhinox hide', this is a very dark brown. In the 1680s period,getting a black finish to leather goods was very expensive and from a painting point of view using a base black colour leave no room for shading. The Dark brown can be shaded to near black.


Stage 5
So having stressed the need to be neat and tidy when applying paint all the way through these articles, being realistic paint does stray...

Painting pretty much finished...

You get splashes of one colour on another, your hand wobbles and the paint for the straps ends up on the coat etc - well we're all human!


So this stage is about going back and correcting all your mistakes as best as possible, take your time, one colour at a time the more accurately you apply the colour the better the finished product.

... and ready for the shading and scenics stages
Once happy you have corrected mistakes then continue adding detail - various browns for hair colours, brass for sword hilts, bayonet details, musket and powder horn details etc. Blue sashes for officers and fringes on the pikemen's sashes. Dark grey for the 'ten apostles', add on red ties on the breaches, red laces on the shoes and a suitable colour for the matches each musketeer has in their hand.

The detail makes the figure so again spend time here, you 'll be surprised at how quickly such detail can be added and it pays dividends once the unit is completed.

Next time I'll talk about applying the Army Painter shading products, basing the figures and adding the final detail - the unit's flags

Saturday 4 April 2015

Painting 28mm 17th Century Lowland Scots - Part One

I thought it might be fun to record the steps that I typically go through to paint up a unit of 28mm figures for my current favourite period - the Late 17th Century Wars...

In this case the figures are Front Rank Lowland Scots in bonnets, as such this article will discuss some of my thought processes,hints and tips and hopefully provide inspiration to others wanting to dabble in these larger figures but worried that their painting skills are not up to it.

Lets be clear from the start - I do not rate my self as a great painter,however, I can apply paint fairly accurately onto  figure and then using the available products, I think these can be converted into passable wargames figures.

The other point to make clear is that I'm also not a photographer, so apologies for the quality of my pictures!

For purposes of my games I like to have big regiments - 28 figures - 2 blocks of eight Musketeers each side of a central block of 12 Command and pikemen. Yes I know this is a little over the top but the usual 18 or 20 figures per regiment just don't seem to look right to my eye.

For painting purposes I usually paint-up each block separately in batches of 8 to 12 figures it meas a manageable number of figures in each batch, you don't get too bored painting each batch and you get to see the end results at regular intervals!

Stage 0
So before you even get your pints out the first thing is to spend time cleaning up your figures. These Front Rank figures are very crisp and have great detail, applying paint to them is really a process of drawing out that detail. It is vital that any flash or other blemishes are removed form the castings before going any further.

A small needle file and patience is all that is needed, removing mould lines and snipping off any unwanted flash, it should only take you 4 or 5 minutes per figure. Once this task is completed I attach each figure to a 2p piece with some Blu-Tac and leave overnight for the Blu-Tac to 'set'.

Sounds like a silly detail but stretch and kneed the Blu-Tac until soft,use a small piece to attach figure to the 2p piece and overnight the Blu-Tac hardens and will hold the figure in place for the whole painting process.

Stage 1
Two Muskeers and a Pikeman, undercoated in white
All paints that I use are Acrylic, made by different manufacturers, typically Citadel, Foundry, Vallejo as well as generic artists paints picked up from Hobby Craft or the like.

For undercoating I use generic artists acrylic paint, applied with a fairly big, flat ended brush, and worked so that the paint gives a thorough covering to the case metal and gets into every nook & cranny of the figure, without clogging-up any of the figure's details.
Sergeant Ensign and Officer undercoated in white.
I again leave the figure overnight to allow the undercoat to dry and take the coloured paint without any 'bleed' into these colours....


Stage 2
Grey beaches and socks added
So now to the colours, in this case the unit I am painting is going to be representing Grant of Grant's lowand infantry regiment,they were typical of many such Scots units of the time so I can use these as generic Scots units on the wargames table.

That said there is some debate over how many units wore the bonnet by the late 1680s as there is evidence to say that many regular units preferred to wear a hat rather than bonnet to distinguish themselves as 'proper' soldiers.
I debated having red breaches and socks for officers
but went for grey i the end

Anyway - I have other Scots regiments in hats so I fancied doing one in bonnets ..

First colour - grey for breeches and socks, simple task, apply the paint with a 'No 2' brush


Stage 3
This is really hard to show on my photos, I use  good quality white paint to do cuffs, shirt sleeves, cravat & sashes. This provides a much more opaque and 'clean' white than can be achieved with the generic white paint used to undercoat.
White cuffs,shirt sleeves, sashes and cravats

Feathers in Officer's hats also white
Again there s a debate over the exact colourings of sashes for many regiments,or even how common the practice was as we moved later in the period. I have chosen to have pikemen in white sashes with a blue fringes. I'm currently thinking that the offices will have blue sashes but want to check this out against my reference books before committing paint to brush!


So next posting we'll start adding real colour to the figures, coats, flesh and equipment...